- Home
- Photo Galleries
- Portrait Photography
- Landscape Photography
- Street Photography
- China
- Ethiopia
- India
- Holy Ganges
- Varanasi
- Varanasi Ganga Aarti
- Varanasi, Manikarnika Ghat
- Varanasi Streets & Alleys
- Varanasi Demolition
- Varanasi Fruit Market
- Sarnath
- Brick Kilns
- Tamil Nadu, Chennai & Mamallapuram
- Tamil Nadu, Fort Tirumayam & Madurai
- Tamil Nadu, Tiruvannamalai & Thanjavur
- Kerala, Munnar
- Kerala, Peryiar
- Kerala, Backwaters
- Kerala, Kochi
- Kazakhstan
- Myanmar
- Senegal
- Uzbekistan
- Travel Blog
- China
- Ethiopia
- India
- Tamil Nadu & Kerala
- Varanasi
- Whato to do in Varanasi
- Varanasi Life along the Ghats
- Varanasi Death along the Ghats
- Varanasi Ganga Aarti Ceremony
- Varanasi demolished to honor Shiva
- Varanasi Fruit Market
- “Varanasi, A Journey into the Infinite”
- Sarnath
- All about River Ganges
- Holy Shit. All about Indian Cow Dung
- Clean India Project
- Brick factories
- Tilaka, pundra, bindi: what is the mark on Indian foreheads?
- Kazakhstan
- Mongolia
- Ulaanbaatar, the coldest capital in the world
- What to do in Ulaanbaatar
- Chinggis Khan Museum, 6 floors of Mongolian history
- Gorkhi-Terelj National Park and Bodgkhan Natural Reserve
- Altai Mountains, Things to do in Olgii and Sagsai
- Living with the Eagle Hunters
- Sagsai Eagle Festival
- Navrus Festival
- Xöömej, Mongolian throat singing
- Mongolian Food
- Myanmar
- Senegal
- Uzbekistan
- Latest Posts
- Photography Blog
- About
- Prints
Whether you’re a beginner photographer or a semi-professional, traveling provides a great opportunity to practice capturing exotic and original shots, starting with landscape photography. Here are my tips on how to get the most out of your photography equipment and some advice on transforming an ordinary photo into a personal and emotional shot.
© Article and Photos by Andrea Marchegiani. Unauthorized reproduction prohibited. Granted for publication in PROGRESSO FOTOGRAFICO N. 64, July 2020.
Share with your friends:
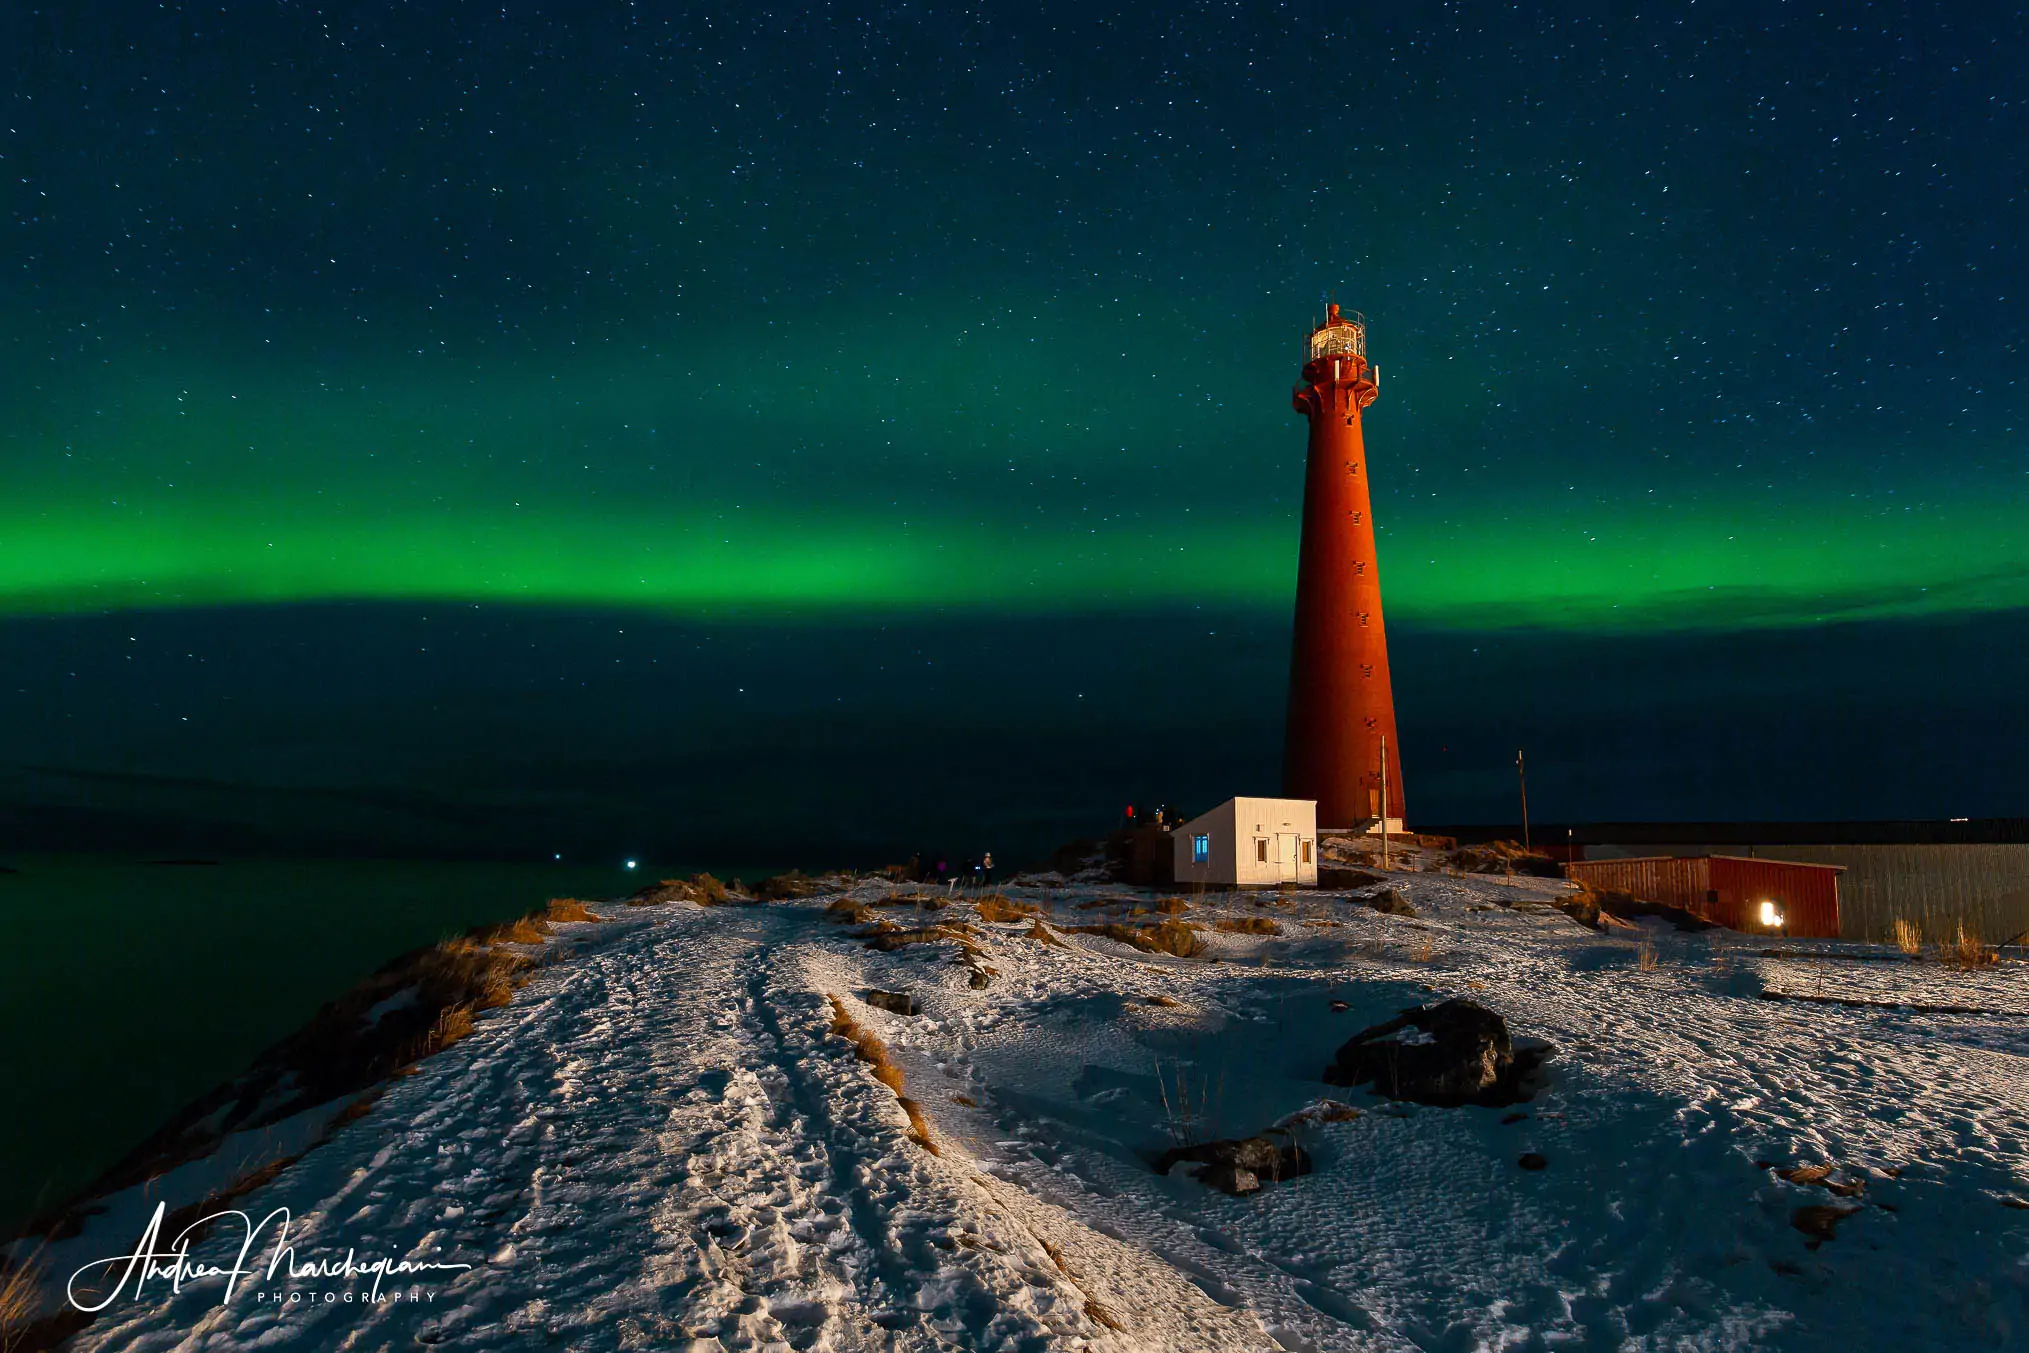
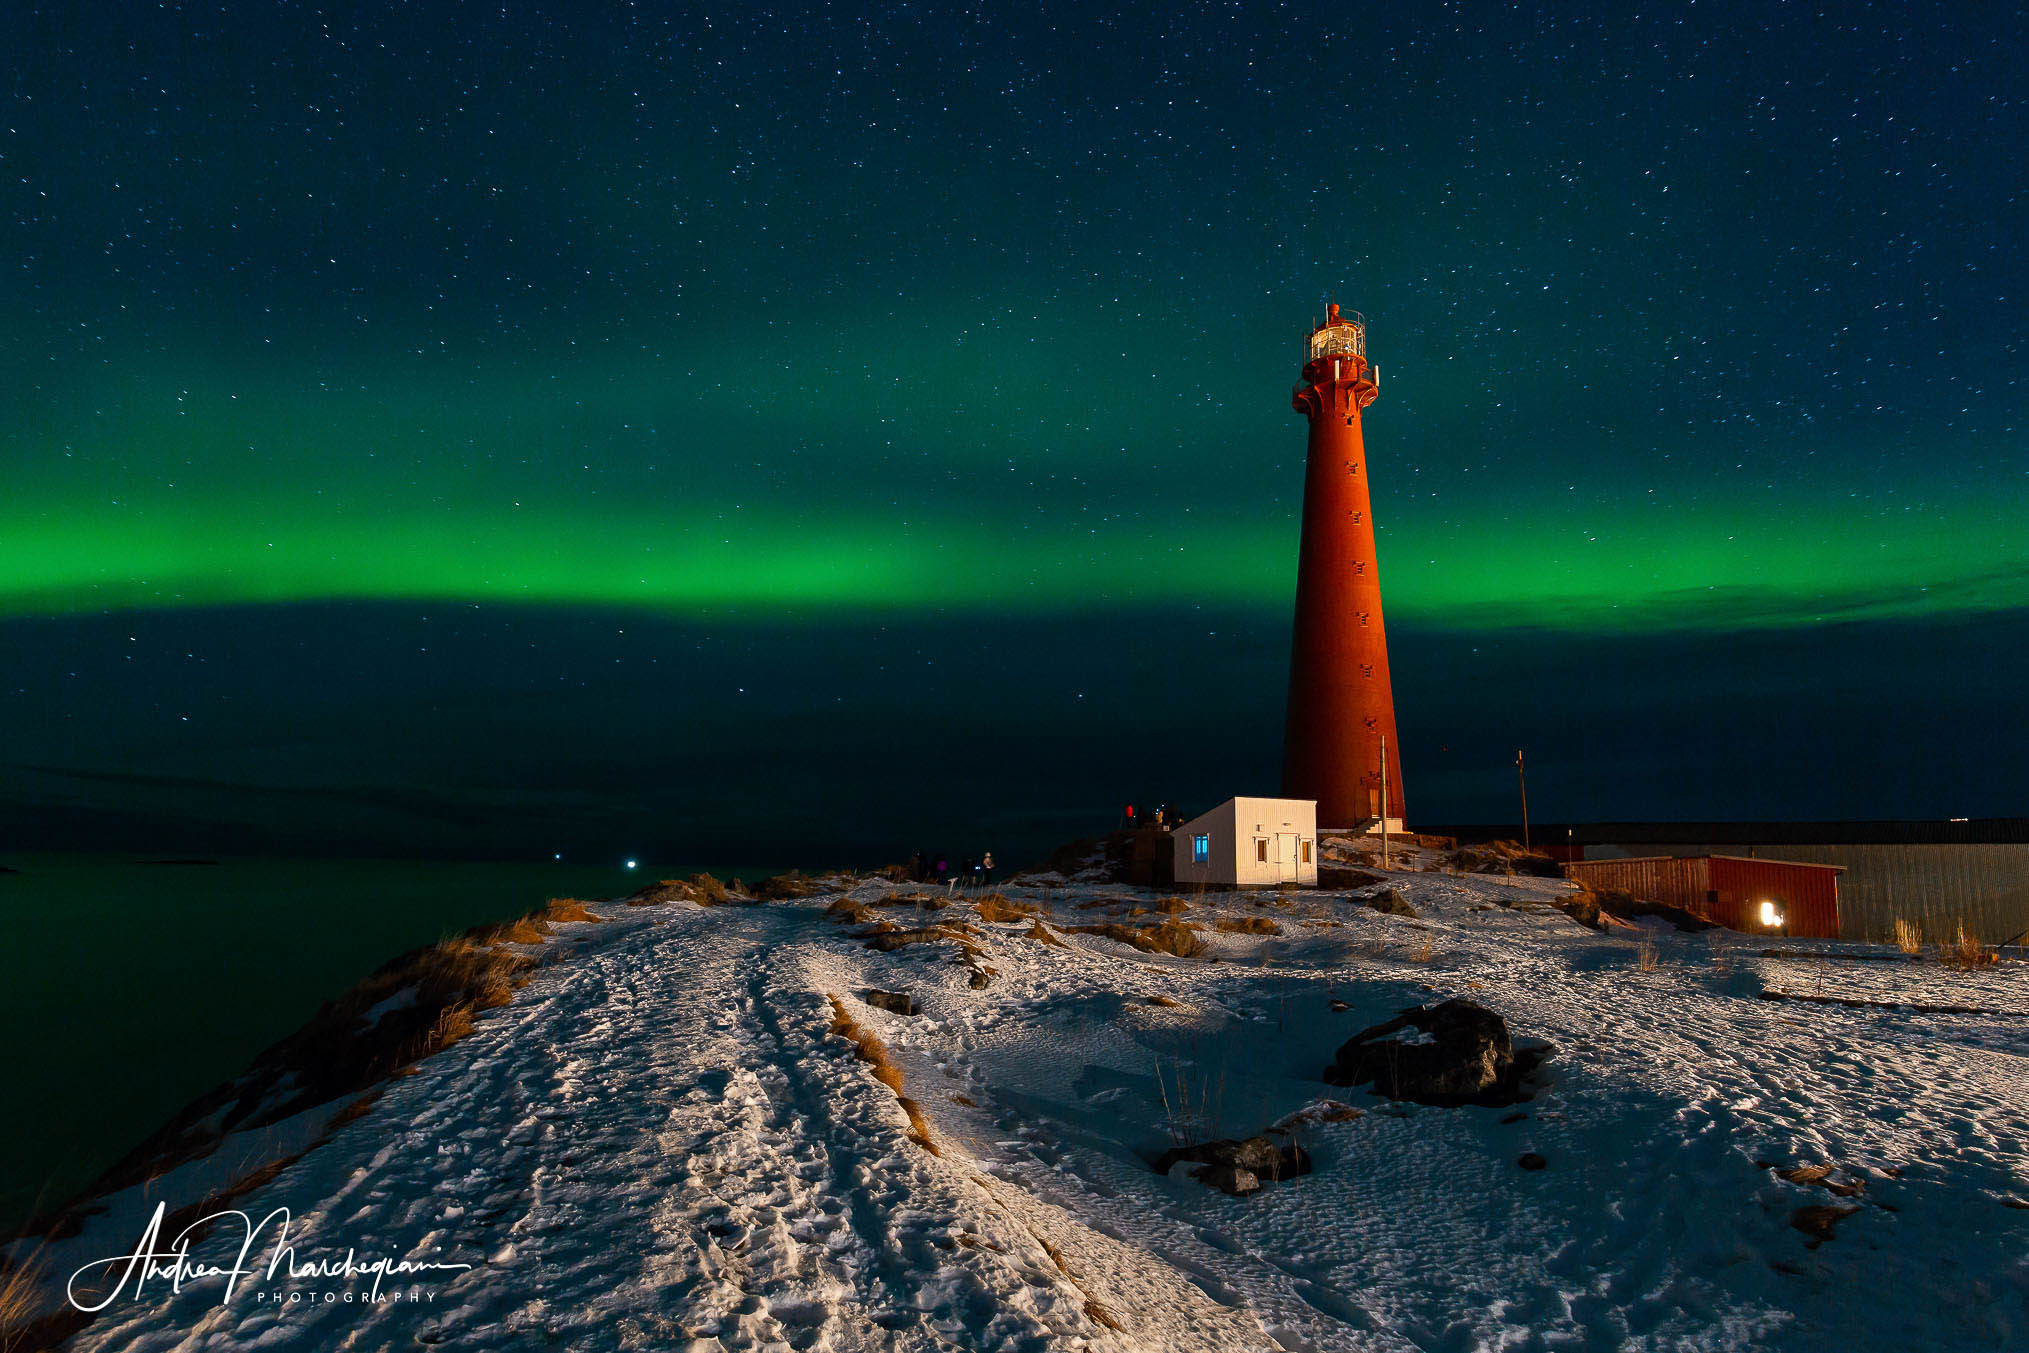
Andenes Lighthouse, Lofoten Islands (Norway).
I manually focused on the lighthouse, using the Live View preview as a reference. As the 30-second exposure unfolded, the aurora borealis took on the appearance of a long horizontal green streak. A faster shutter speed would have better frozen the celestial motion, but I wouldn’t have achieved such a luminous trail. I used a professional tripod for maximum stability and shot using a remote control to avoid any vibrations.
>> Shooting data: 30 seconds at f/6.3, ISO 1000. 16mm focal length on a full-frame camera.
More than a distinct genre, I believe travel photography is a heterogeneous container. Traveling takes me to vastly different situations, where my gaze is drawn to both stunning landscapes and exotic faces, urban scenes as well as unusual dishes. Travel photography, therefore, requires extensive and versatile skills, a vigilant eye for our surroundings, and – not least – the ability to make the most out of the limited gear that fits into a backpack.
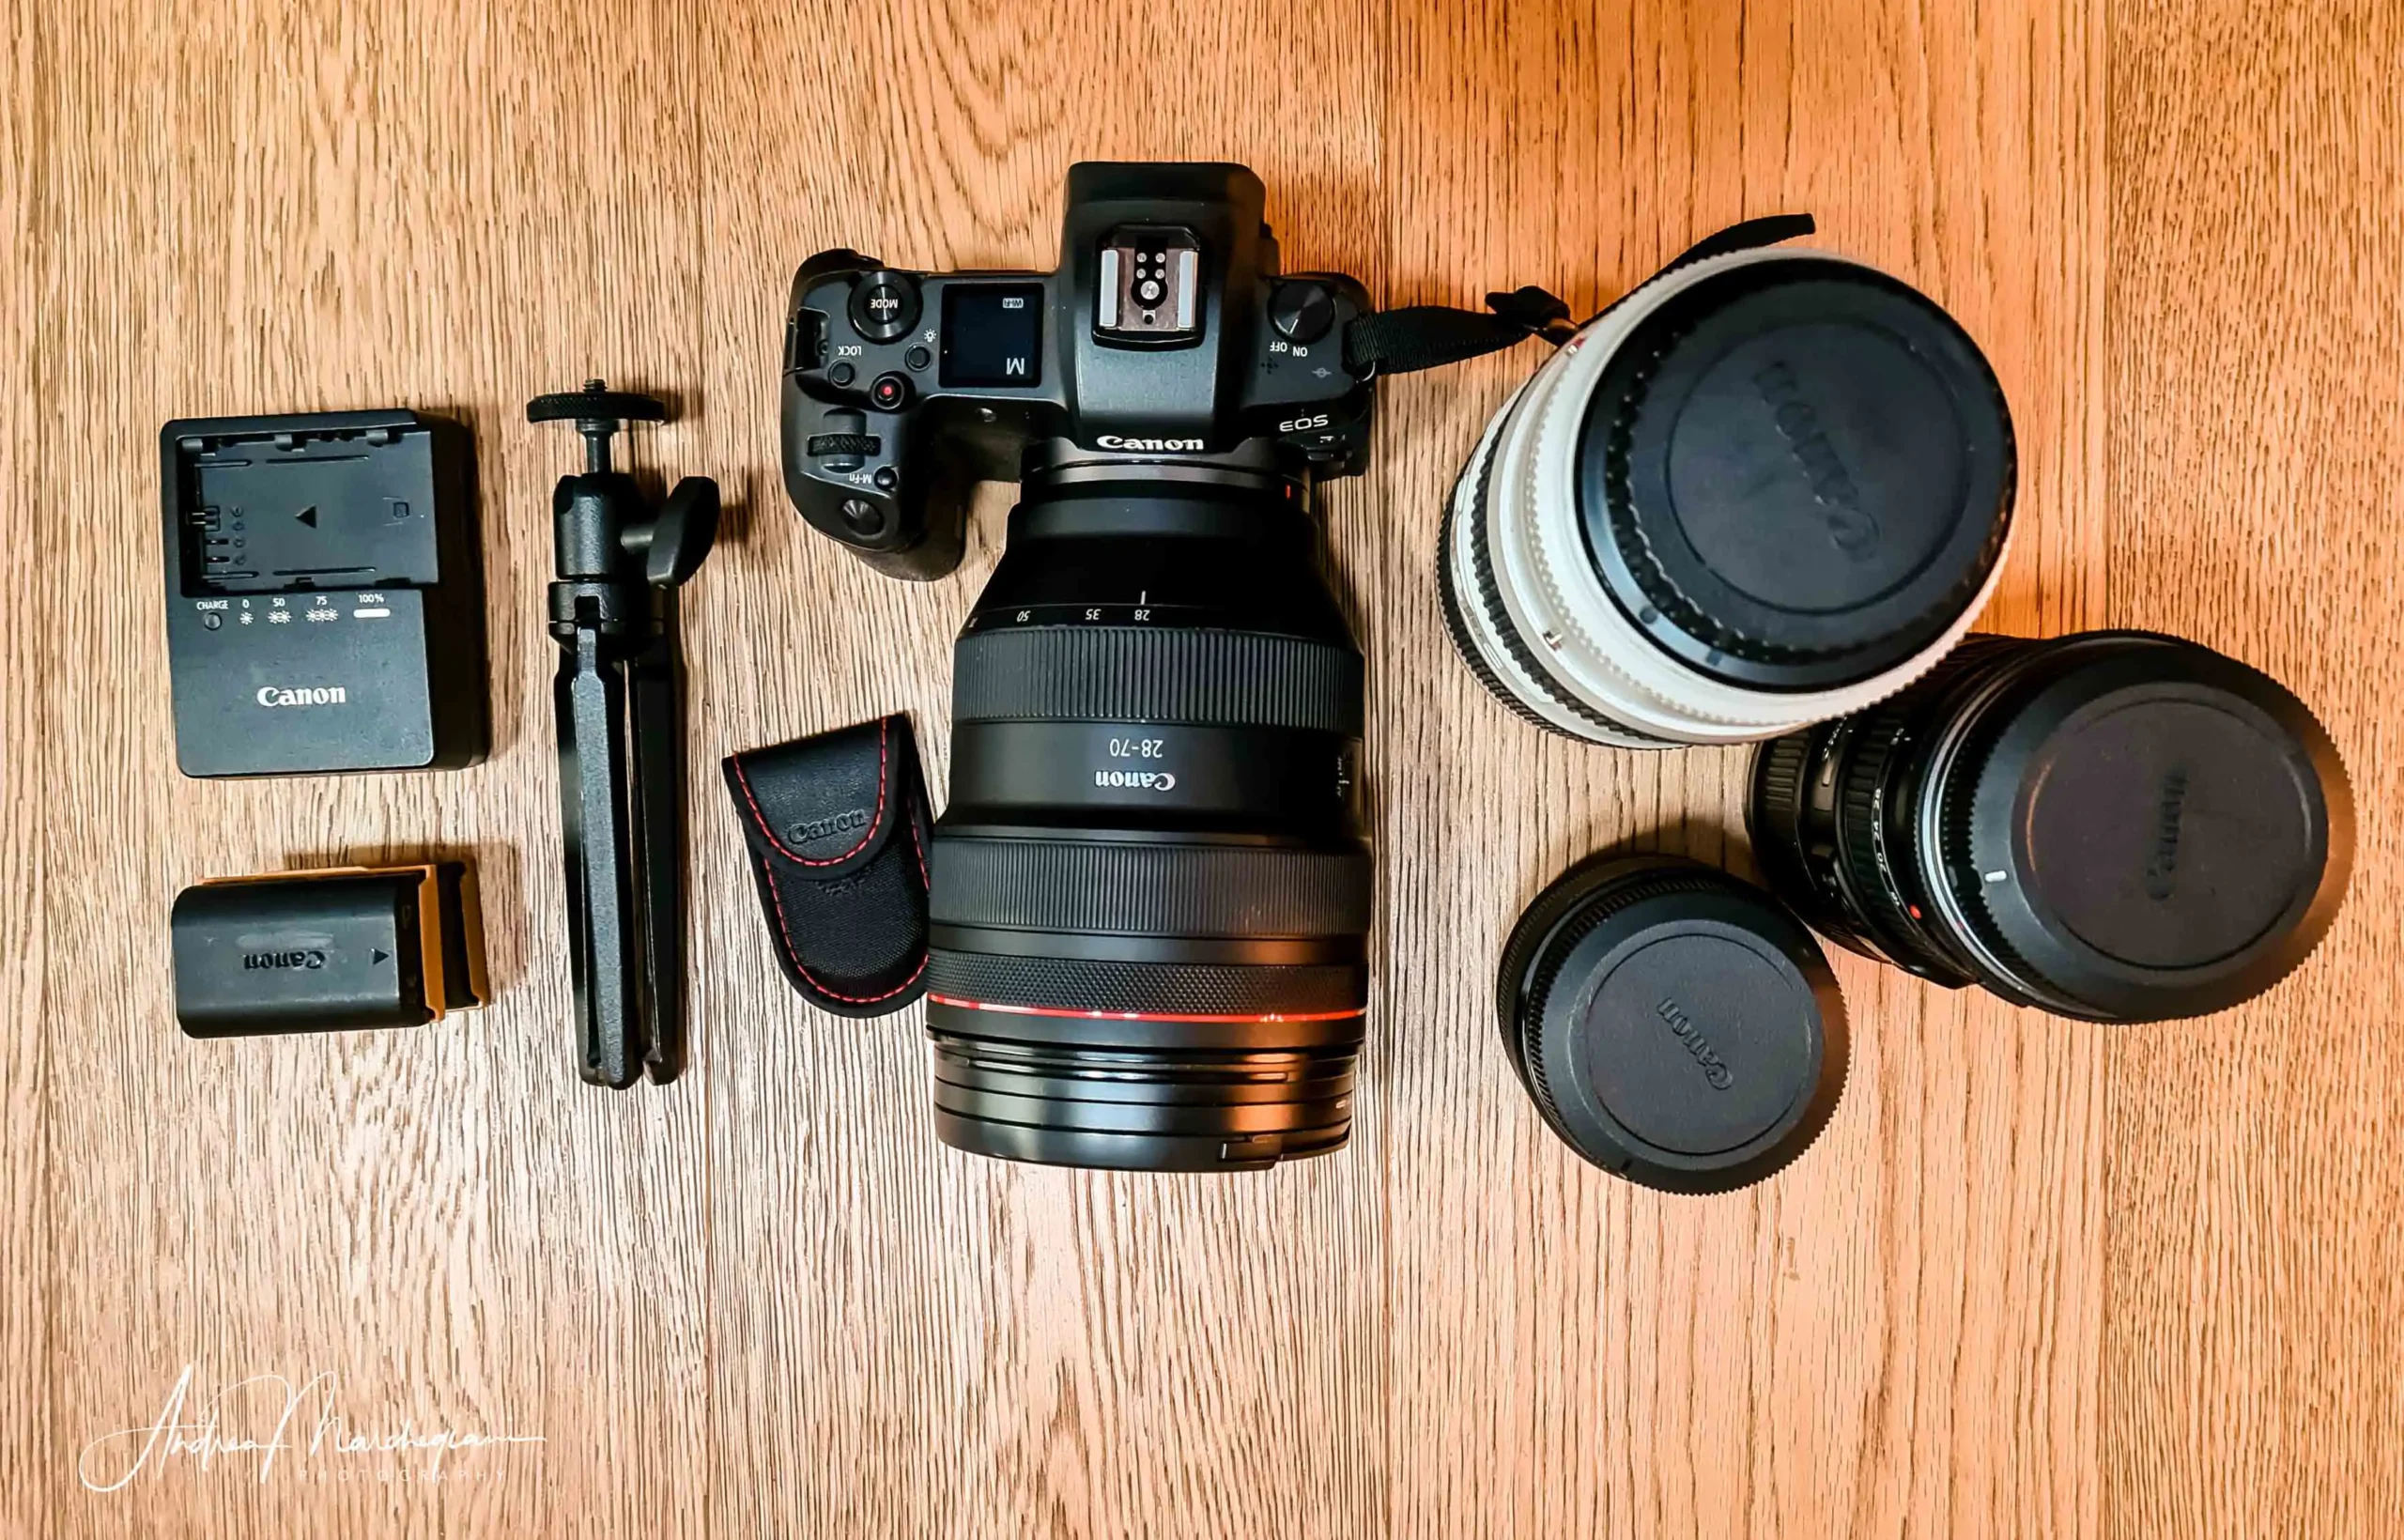
While on the road, I try to leverage all my knowledge but avoid getting too caught up in technicalities. My priority remains flowing from one landscape to another, enjoying every unexpected turn and cherishing every encounter. That’s why you won’t find overly specific tools in my bag. I often leave the flash and its pesky extra set of batteries at home and, whenever possible, I avoid carrying professional tripods.
Undoubtedly, the most practiced genre during a trip is landscape photography. Some might not be interested in capturing photos of the exotic foods they eat, while others may prefer not to invade the privacy of passersby and refrain from photographing the people they encounter on their wanderings. But it would never cross anyone’s mind to return home without immortalizing the most captivating views and panoramas in their camera’s memory.
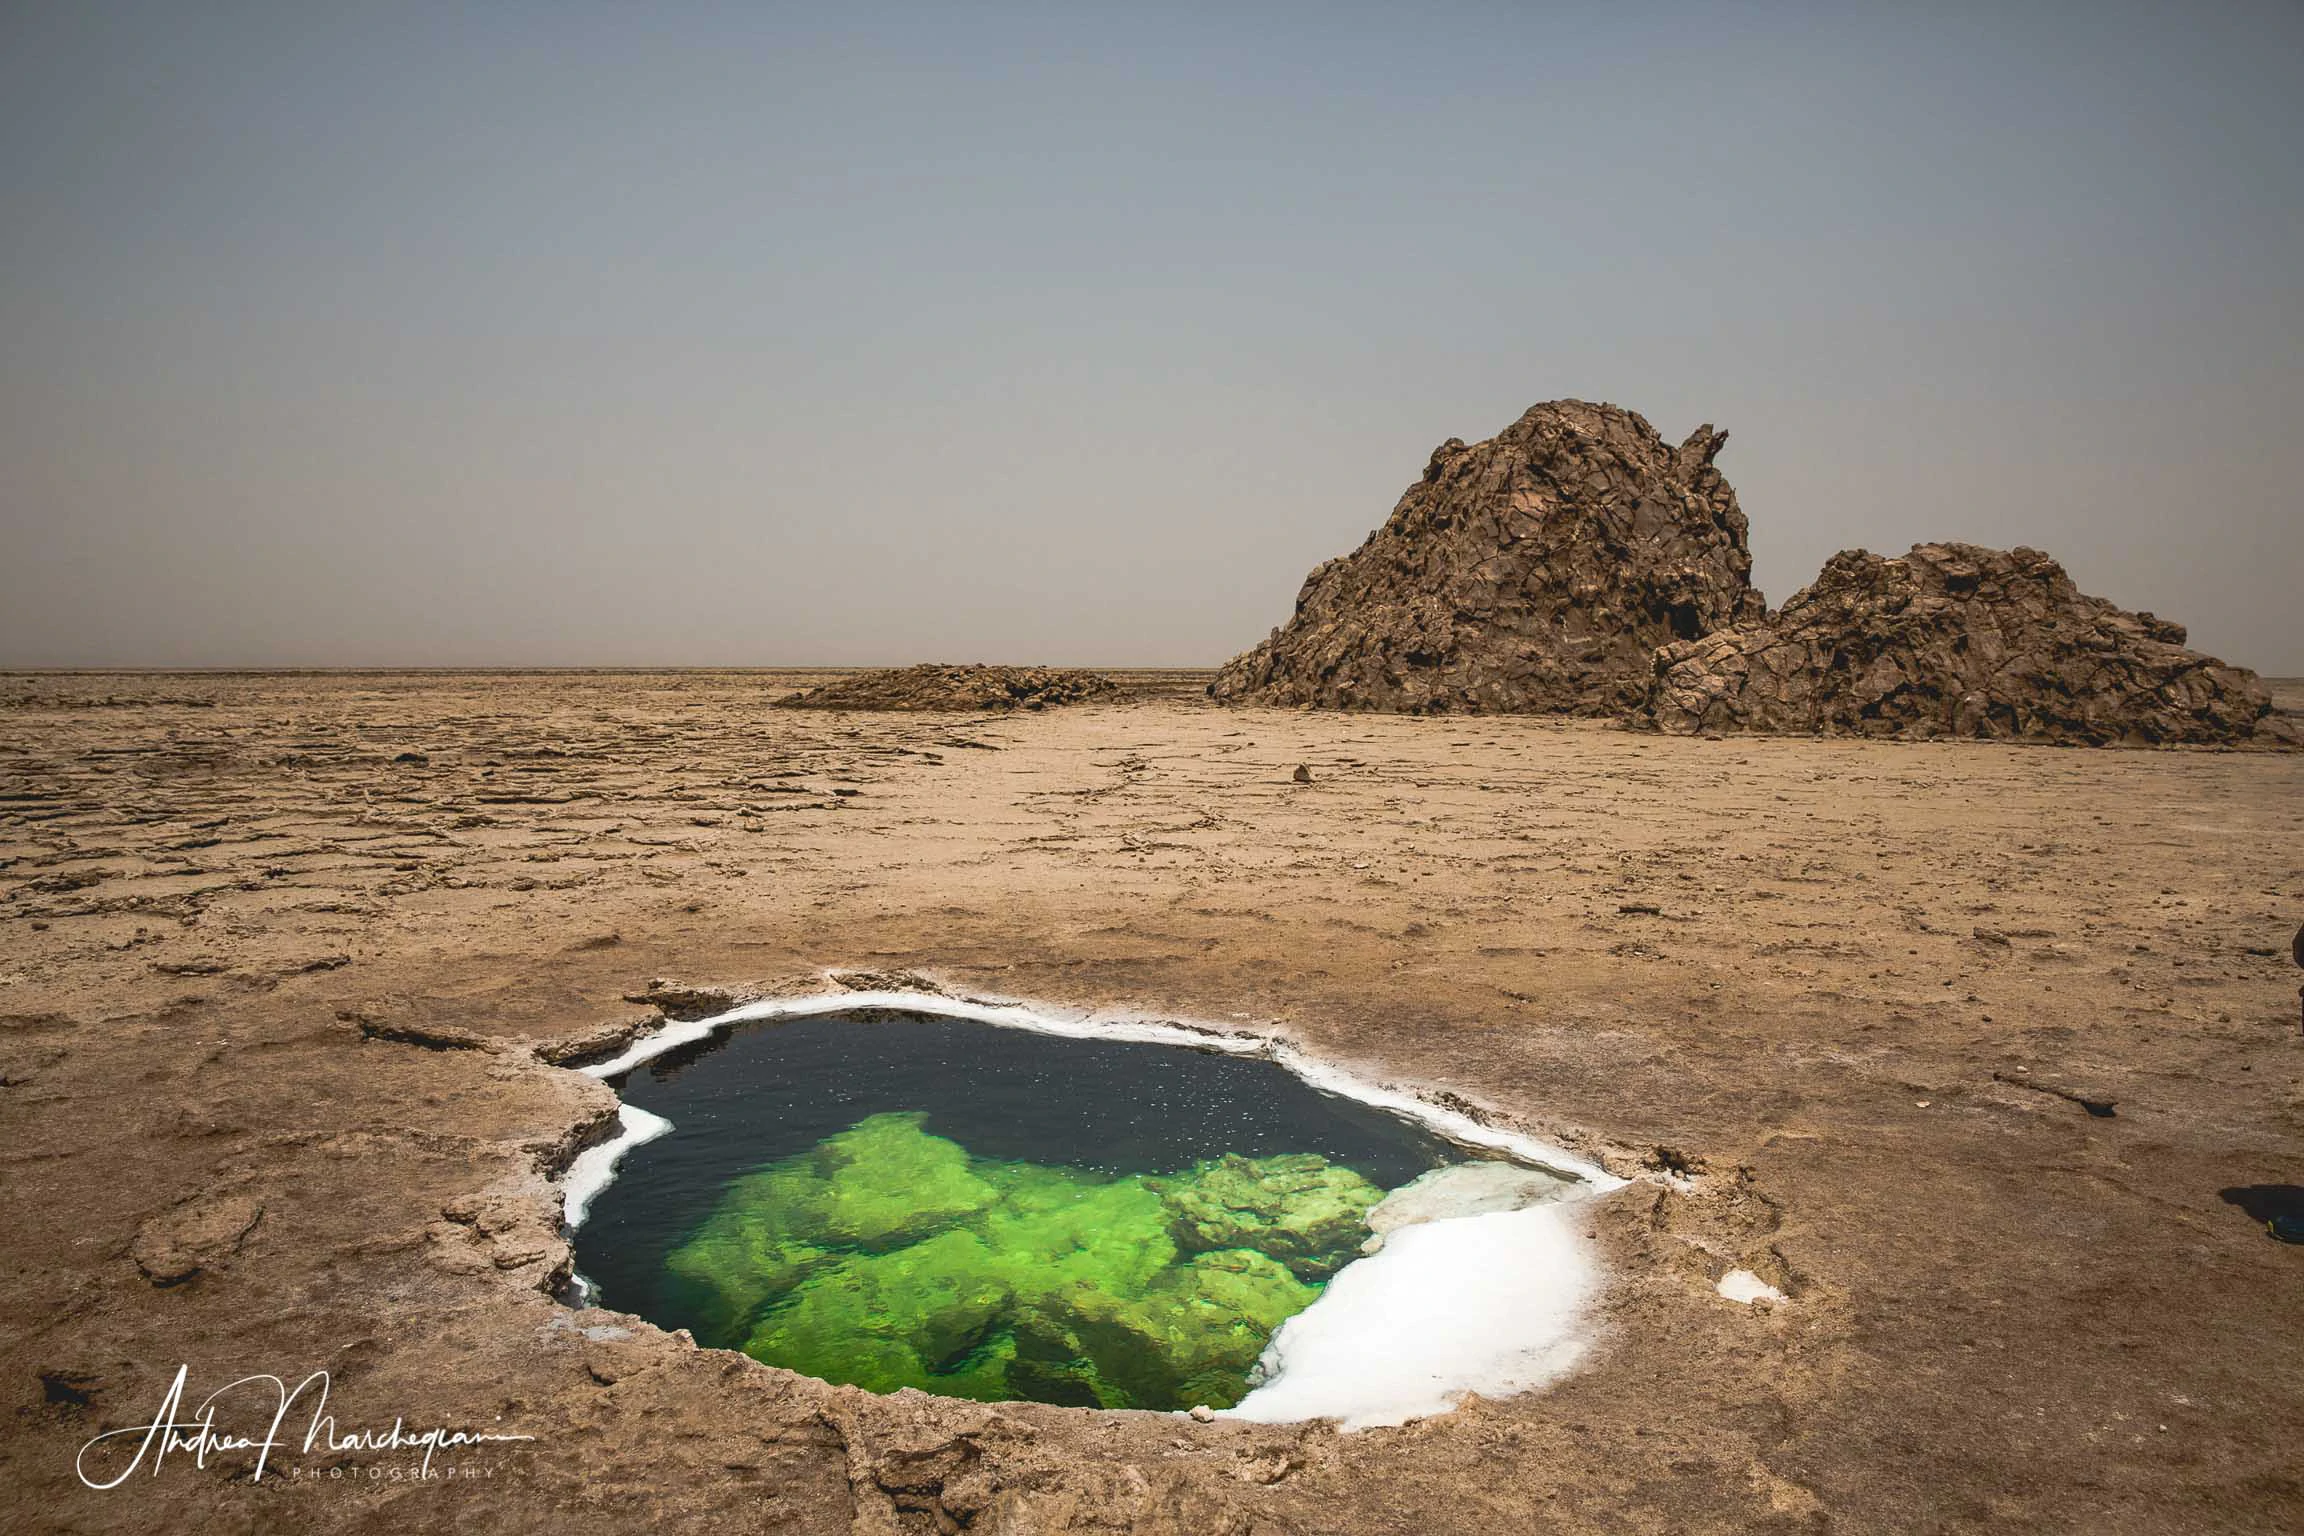
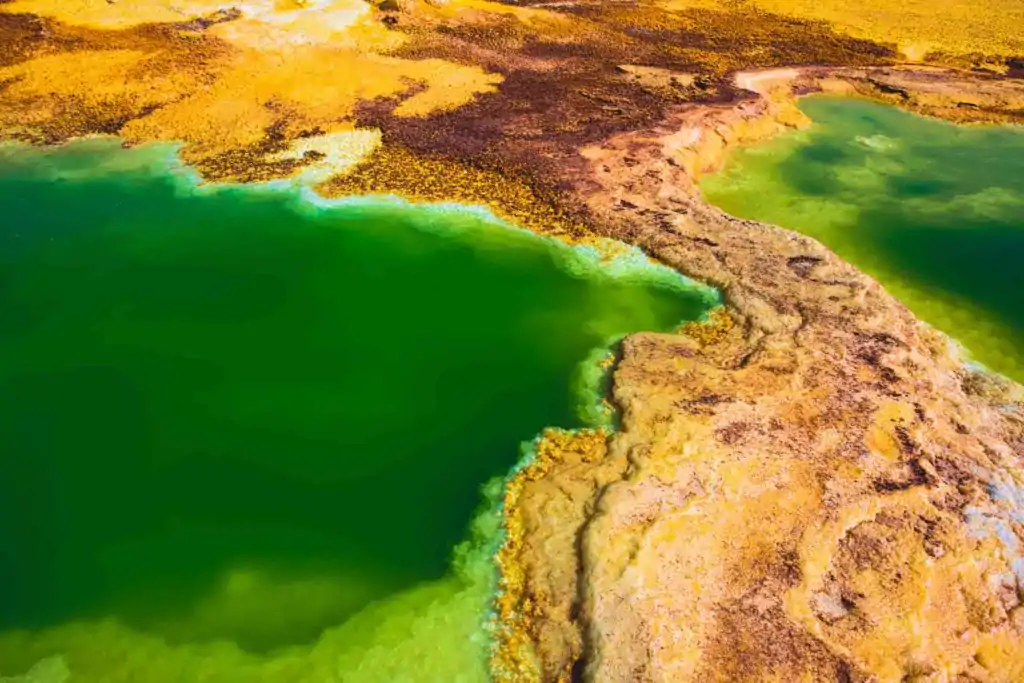
Dallol, Ethiopia.
This acidic water pool completely disrupts the desert landscape. An element that stands out in contrast is always a good subject for our photographs.
>> Shooting data: 1/4000s at f/7.1, ISO 250. Focal length 24mm on full frame.
Here are some tips to improve the composition and technique of your landscape photographs without relying on too specific or expensive equipment:
Identify the most characteristic locations
Some of the destinations you visit are renowned for their natural landscapes. Whether you’re going to Pamukkale in Turkey or flying over Victoria Falls in Zimbabwe, try to capture the place by showcasing its overall beauty. Some may dismiss the result as a “typical postcard photo,” but take it anyway or you’ll regret it. Once you’ve taken the shot, you’ll have plenty of time to focus on details or more personal angles.
Pay attention to composition
– The first rule is simple but essential: keep the horizon line straight. A crooked landscape photo is simply unattractive. Some may argue that a tilted photo reflects the photographer’s personal interpretation, perhaps expressing inner discomfort or subverting conventional spatial perception. All valid points. However, for me, a tilted photo is just a mistake, especially in landscape photography.
– The rule of thirds is the most well-known compositional technique in the world. Divide the frame into three horizontal and three vertical sections, creating nine rectangles. The points where the lines intersect are strongly attractive areas, and it’s advisable to place the elements you want to draw the viewer’s attention to in those spots. In landscape photography, the rule of thirds is important for deciding where to position the horizon line. Do you want to emphasize the sky or the land? Which one is more interesting to you?
– It’s also possible to place the horizon line exactly in the center. Symmetry, especially when photographing water surfaces and reflections, is very soothing and pleasing to the eye. However, in this case, precision is required to divide the frame into perfectly equal parts.
– We can make our shots more personal by creating a framing effect. Find a leaf, a branch, or an object that comes between us and the horizon and use it as a perspective frame, adding depth to the scene. If we are shooting against the light, this element will appear completely black, and its stylized contours will create a pleasing decorative effect.
– Look for an element that stands out in contrast: a person, an animal, an architectural structure, or a distant vehicle will make the landscape less empty and clearly guide the viewer’s gaze towards that detail.
– Including a recognizable object helps convey a sense of the place’s grandeur. In my travels, I often find that capturing the vastness and grandeur of the landscapes is the most challenging aspect, especially when it’s not possible to provide a spatial reference that helps establish a scale of size. Moreover, images are increasingly viewed on smartphone screens, which complicates matters further.
– The last composition tip relates to diagonal guidelines. Look for an element that diagonally cuts across the frame, such as a road traversing the landscape and leading to the horizon, the course of a stream, or the shape of a hilly landscape or rocky peak. Use these lines to guide the viewer’s gaze from left to right or from bottom to top. By doing so, you will fully interpret the landscape, making it your own. The photo will be personal, and those who view it will truly see through your eyes.
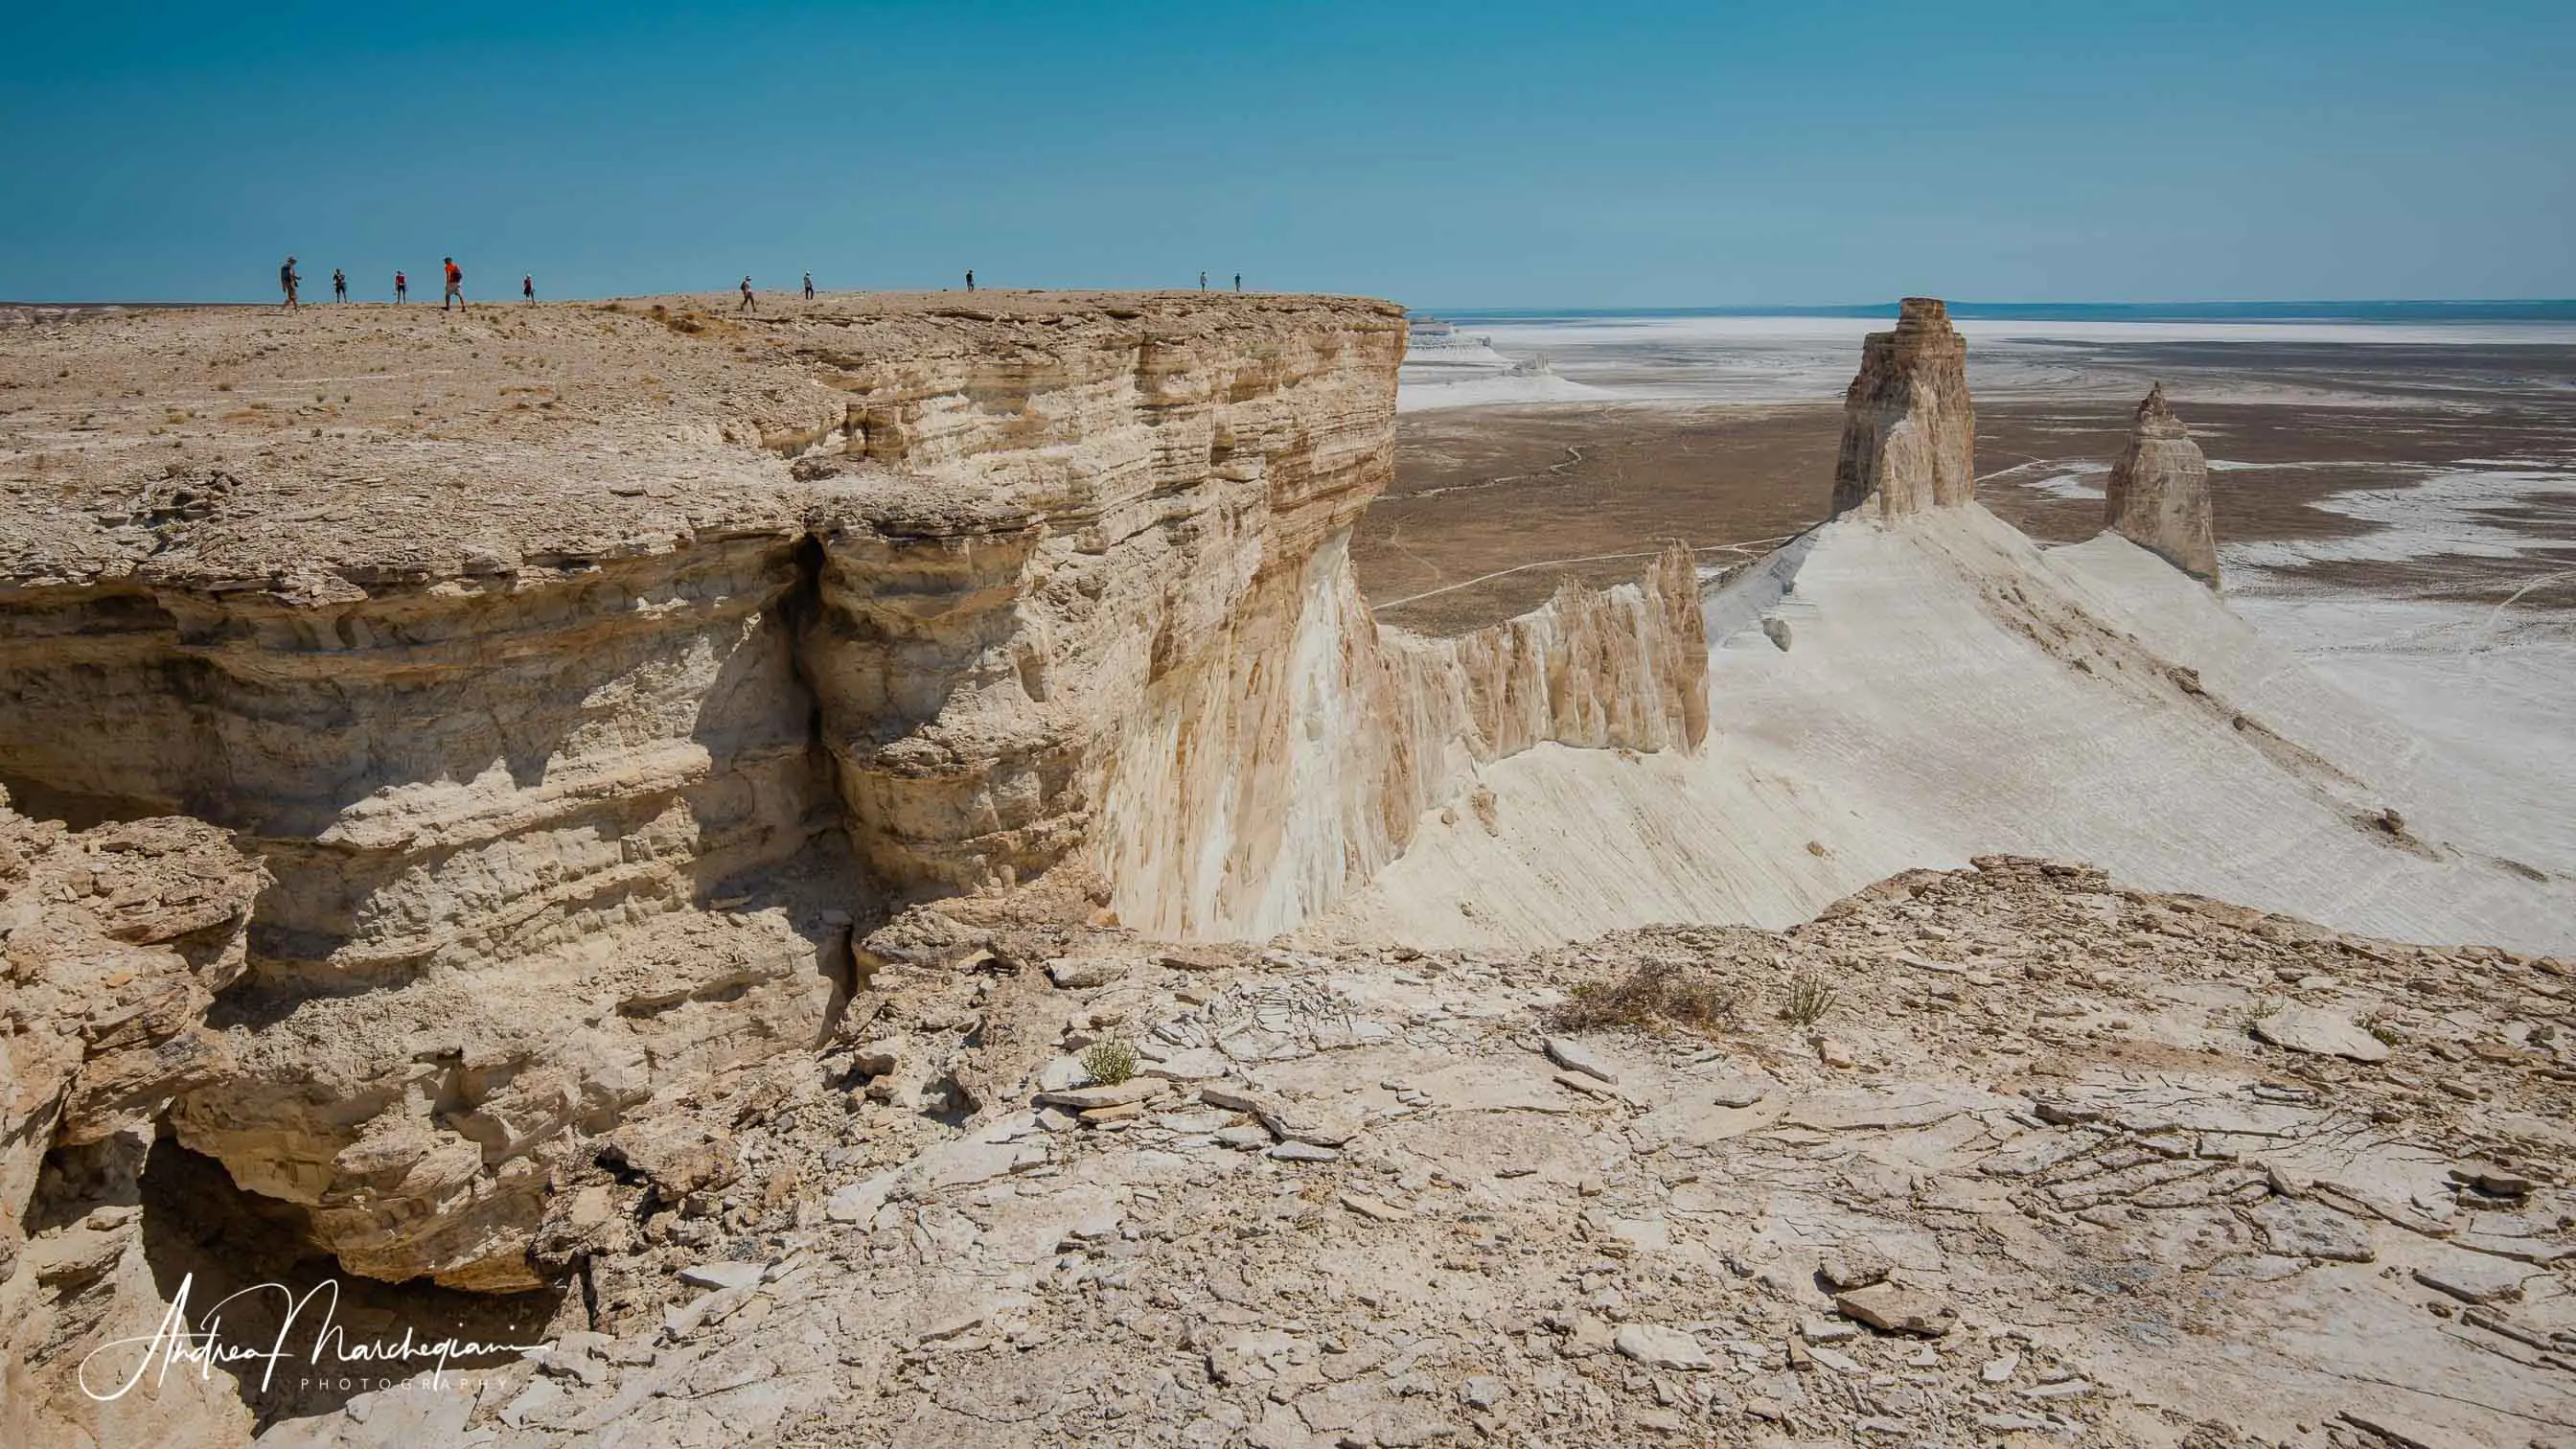
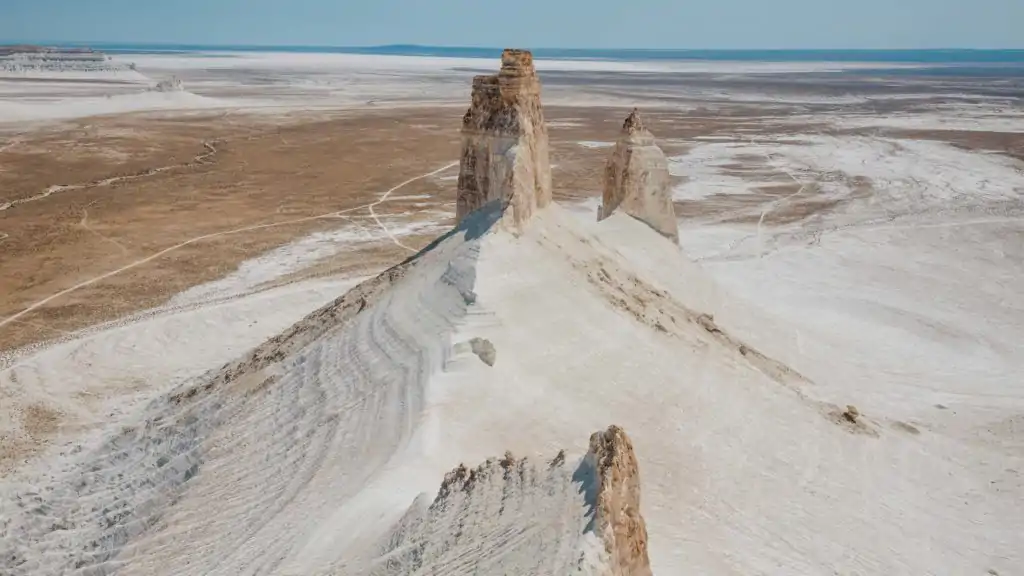
Bozzhira Canyon, Kazakhstan.
I am particularly attached to this shot because I suffer from vertigo, and climbing the rocky massif was a test of courage for me. It is often forgotten that landscape photography is, above all, about overcoming laziness and painstakingly reaching inaccessible places. The horizon line coincides with the peaks of the Bozzhira cliffs: this is generally considered a mistake as it flattens the profile of the scene. However, the inclusion of human figures, appearing to walk suspended in the sky, overturns this sensation and adds a touch of mystery.
>> Shooting data: 1/320s at f/14, ISO 100. 22mm focal length on a full-frame camera.
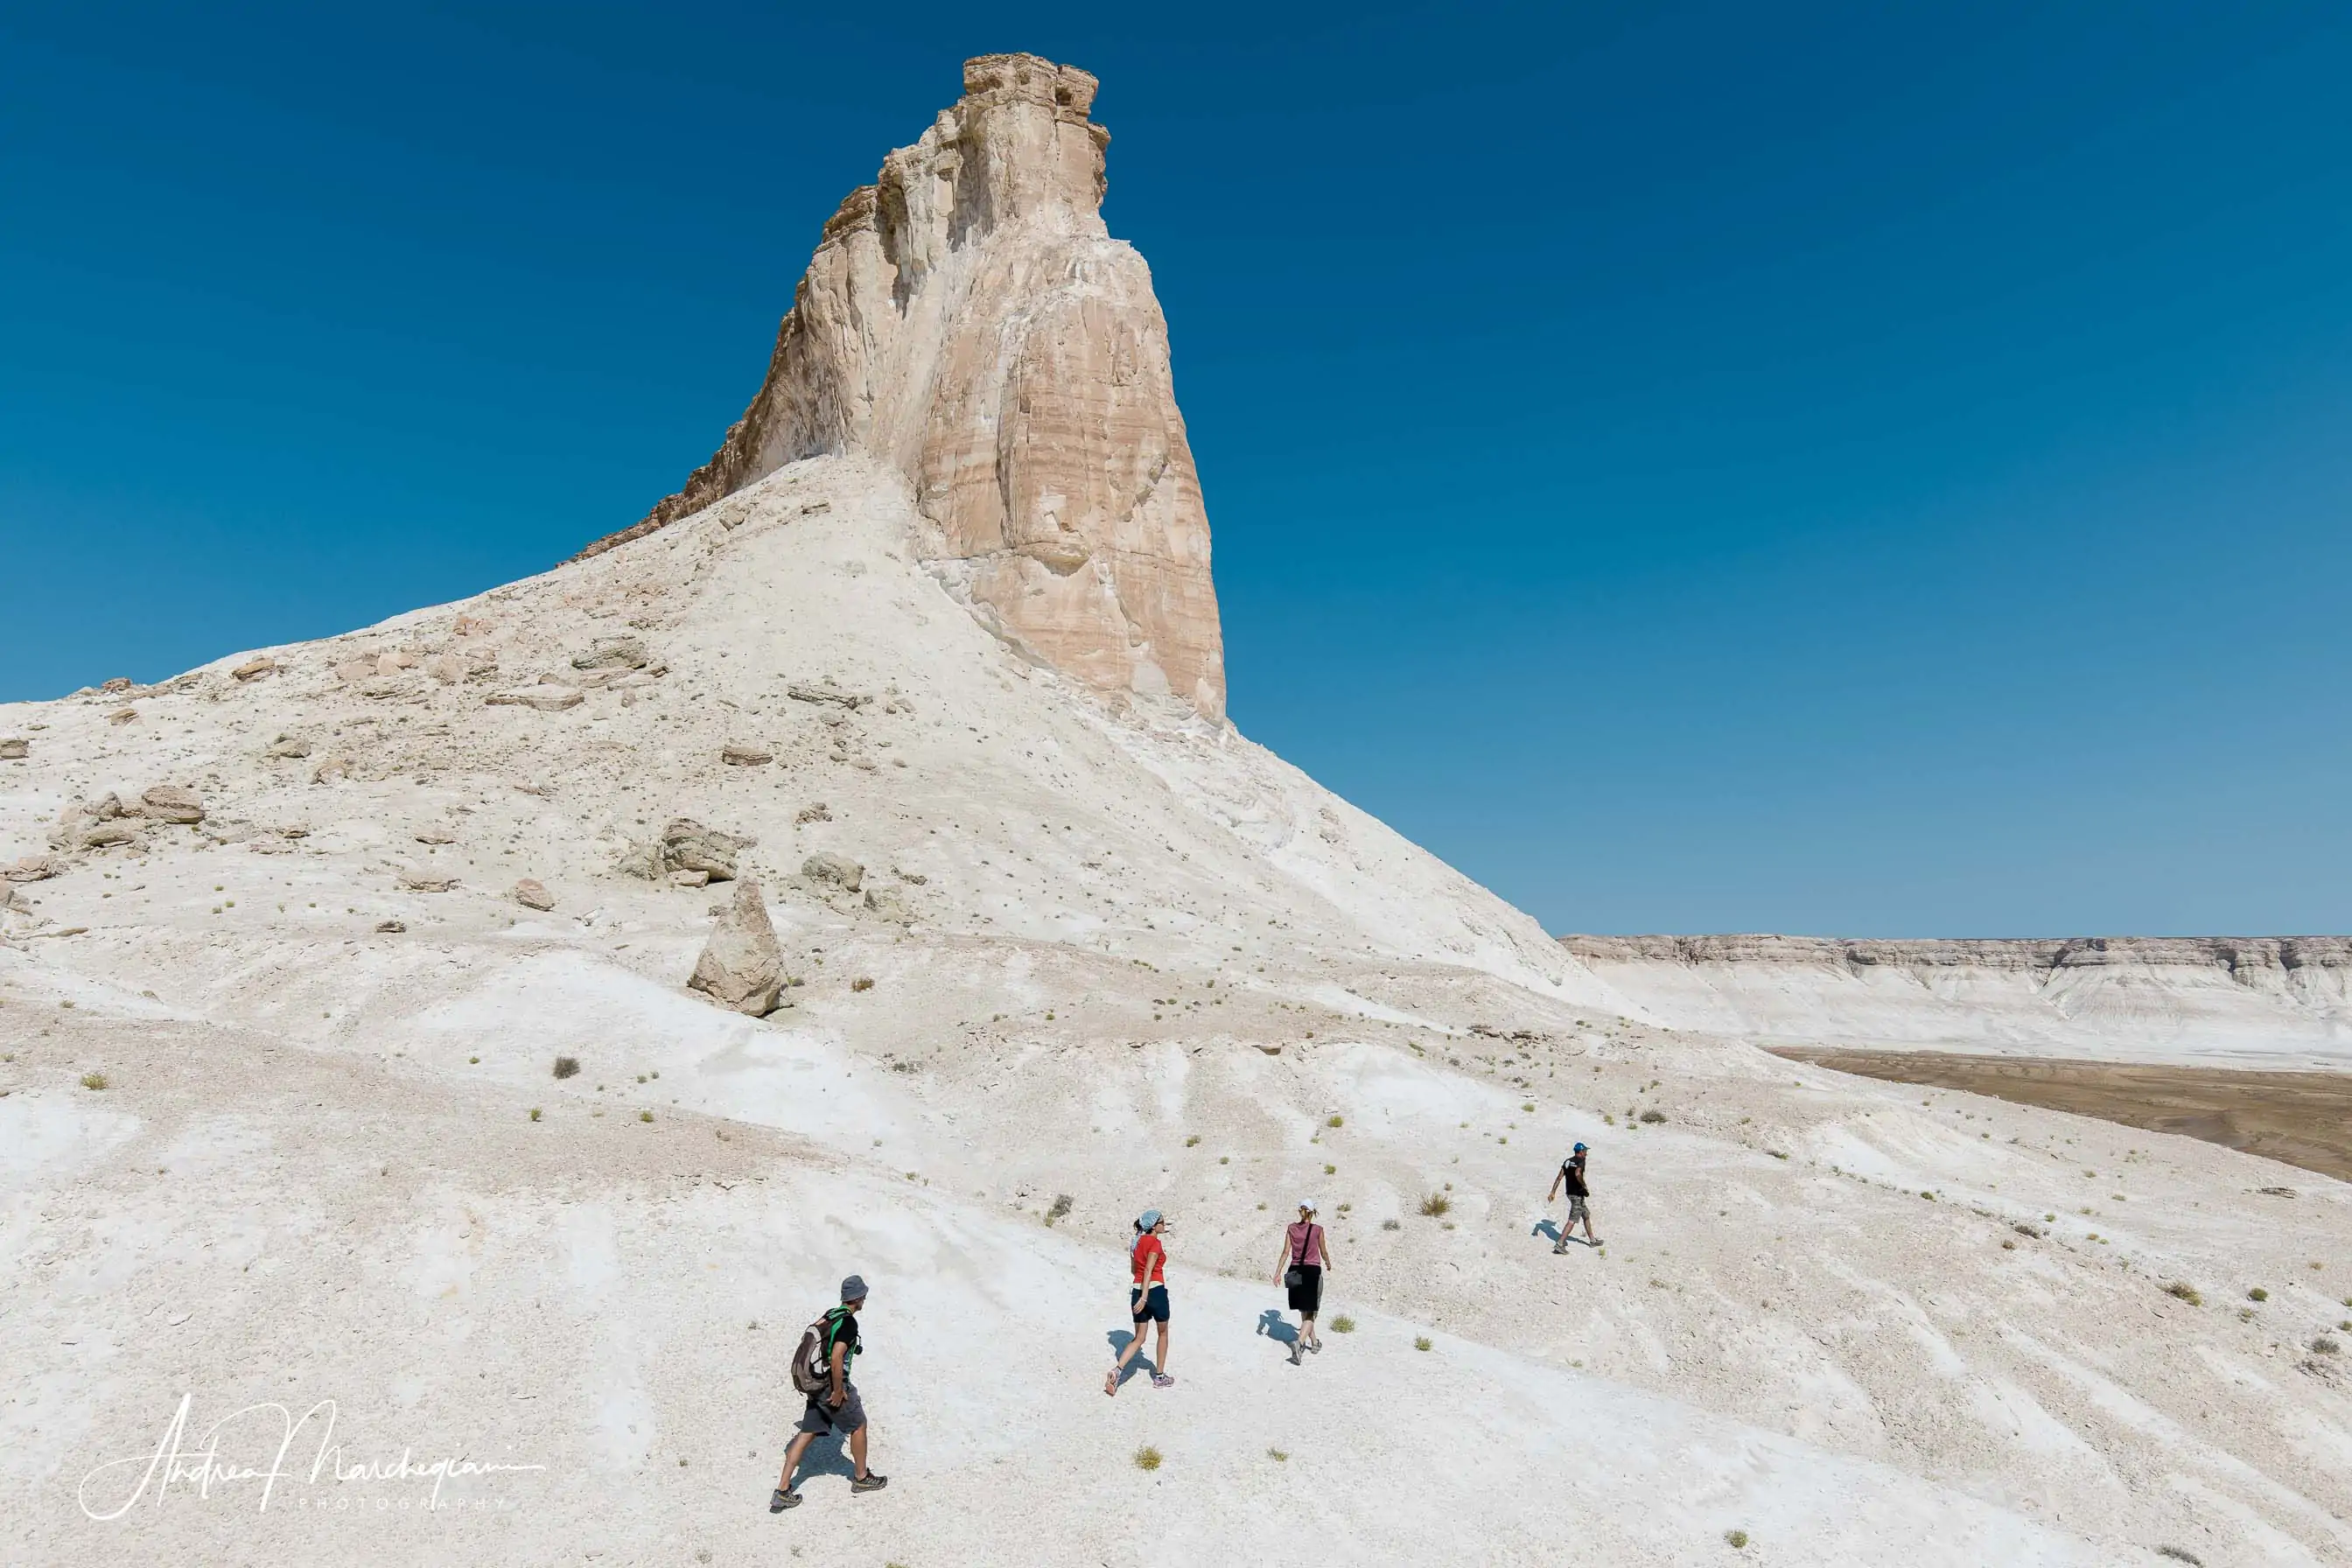
Bozzhira Canyon, Kazakhstan.
The human element in the photo also has a graphic value. The people are walking along an ideal oblique line that holds compositional significance.
>> Shooting data: 1/400s at f/11, ISO 100. 23mm focal length on a full-frame camera.
Shoot in RAW format only
The biggest challenge for a landscape photographer is managing light. Often, the brightness difference between the land and the sky is so significant that it can challenge your camera’s dynamic range. In some cases, it’s impossible to avoid having overexposed areas and others that are too dark. One way to limit this problem is to shoot exclusively in RAW format. You’ll have the opportunity to recover highlights and shadows in post-production. In extreme cases, try using multiple exposures.
Multiple exposures
The most professional way to handle extreme brightness differences is to carry a wide range of polarizing, gradient, or ND filters with you. However, for practical reasons, I never pack them in my bag. You can overcome their absence by taking multiple photos with different exposures and then creating an HDR (High Dynamic Range) image in post-production. You don’t necessarily need a tripod for this technique. Just stay still and capture three consecutive images with different exposures. Many cameras have a dedicated HDR mode to assist with this type of requirement. I recommend framing the scene with a slightly wider focal length than necessary. Leave some empty space at the edges of the frame in case the HDR overlay slightly crops the image perimeter, requiring a crop in post-production.
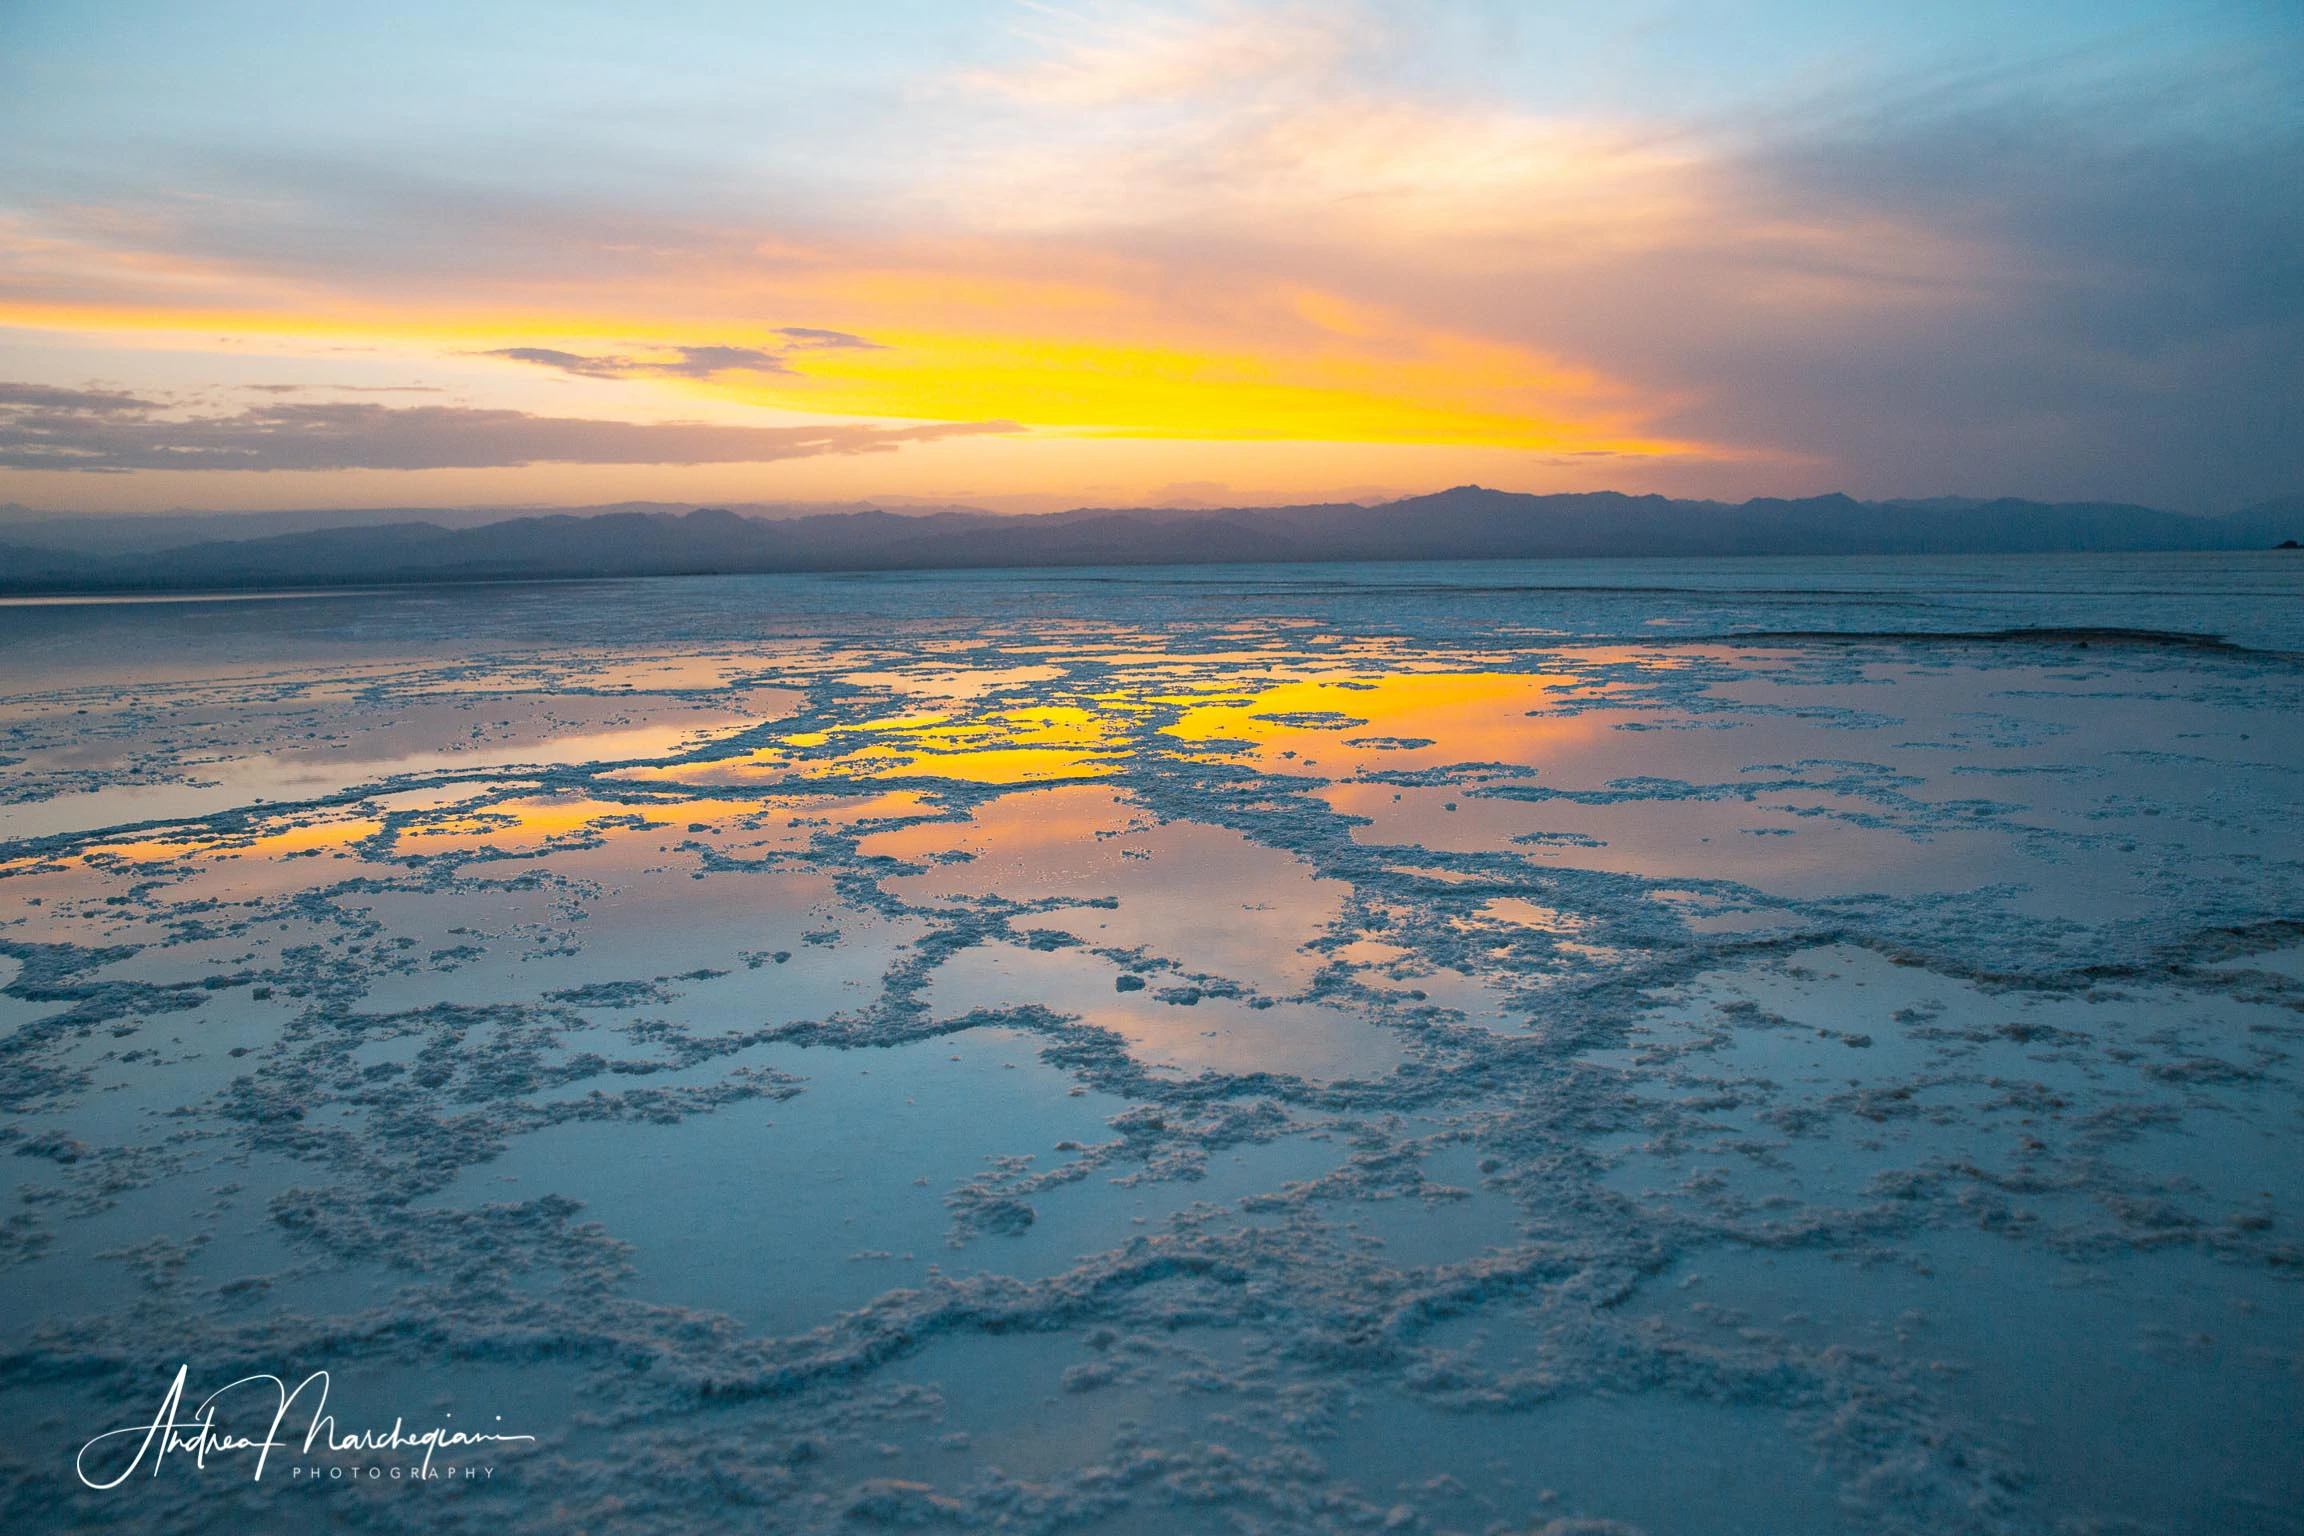
Lake Karum (or Lake Assale), Ethiopia.
The horizon line is positioned at 1/3 of the frame, following the rule of thirds. This allows 2/3 of the space to capture the ripples of the terrain. The salt flats of Lake Karum, with their distinctive irregular formations, reflect the light of the sunset, and the warm and saturated colors bring the landscape to life.
>> Shooting data: 1/800s at f/4.5, ISO 1000. 26mm focal length on a full-frame camera.
Choose the right moment
A flat landscape doesn’t captivate anyone. Sunrise and sunset, with the low sun on the horizon, immerse the landscape in warm and enveloping light. Objects also cast long shadows on the ground, adding volume to the space. If you want to amaze your friends, don’t sleep in too late in the morning and don’t miss the sunset while enjoying an aperitif!
Of course, you can capture interesting photos at other times of the day as well. When the sun is high in the sky, the main rule is to avoid shooting against the light: the outlines of objects lose sharpness, and direct light can create unattractive flare effects on the sensor.
Watch out for diffraction
The golden rule of landscape photography is to shoot with the smallest possible aperture (larger f-number) to achieve greater depth of field. The shutter speeds can also be slower than usual as long as you have a steady hand because the subject won’t run away! Shooting at f/11 or f/16 is ideal, while I would avoid extremely small apertures like f/18 or f/22 because they emphasize dust spots on the sensor and lead to a general loss of sharpness due to diffraction. As our Latin ancestors used to say, remember that virtue lies in the middle path. As the sunlight diminishes, we can open up the aperture and still achieve good depth of field even with wider apertures. Shooting at f/5.6 and f/4 will yield acceptable results, provided you enhance sharpness and clarity using photo-editing software.
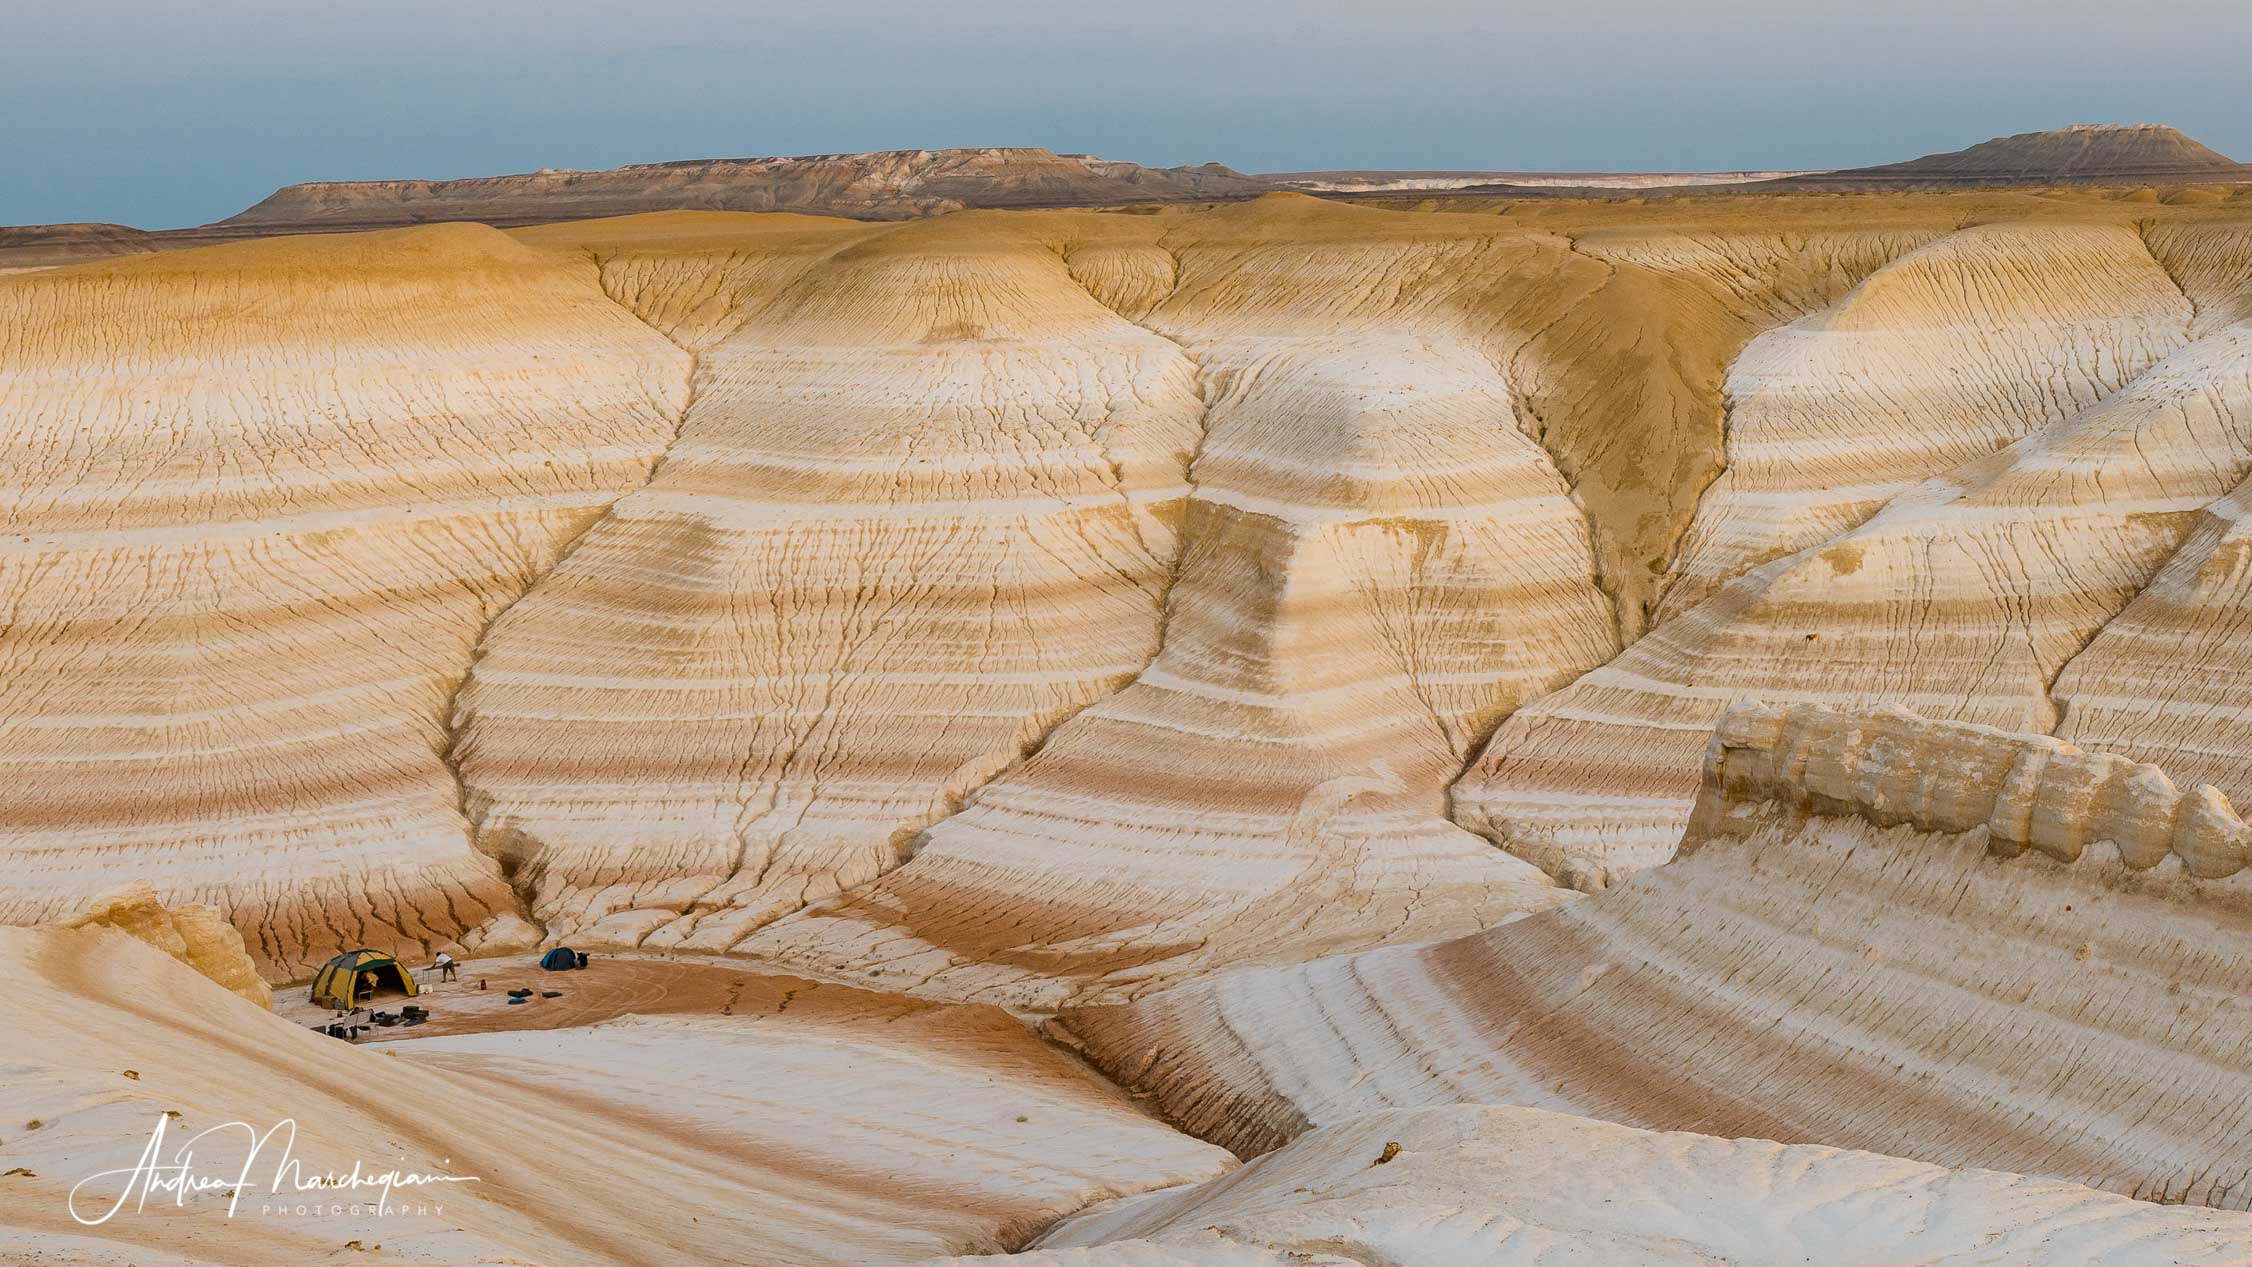
Kyzylkup, Tiramisu Hill, Kazakhstan.
This extraordinary rock formation is called Kyzylkup, but my guide referred to it as “Tiramisu Hill.” The different geological sedimentations create multicolored stripes that have a strong visual impact. The person setting up the camping tent adds curiosity and helps to understand the scale of the massif.
>> Shooting data: 1/250s at f/6.3, ISO 400. Focal length 42mm on a full-frame camera.
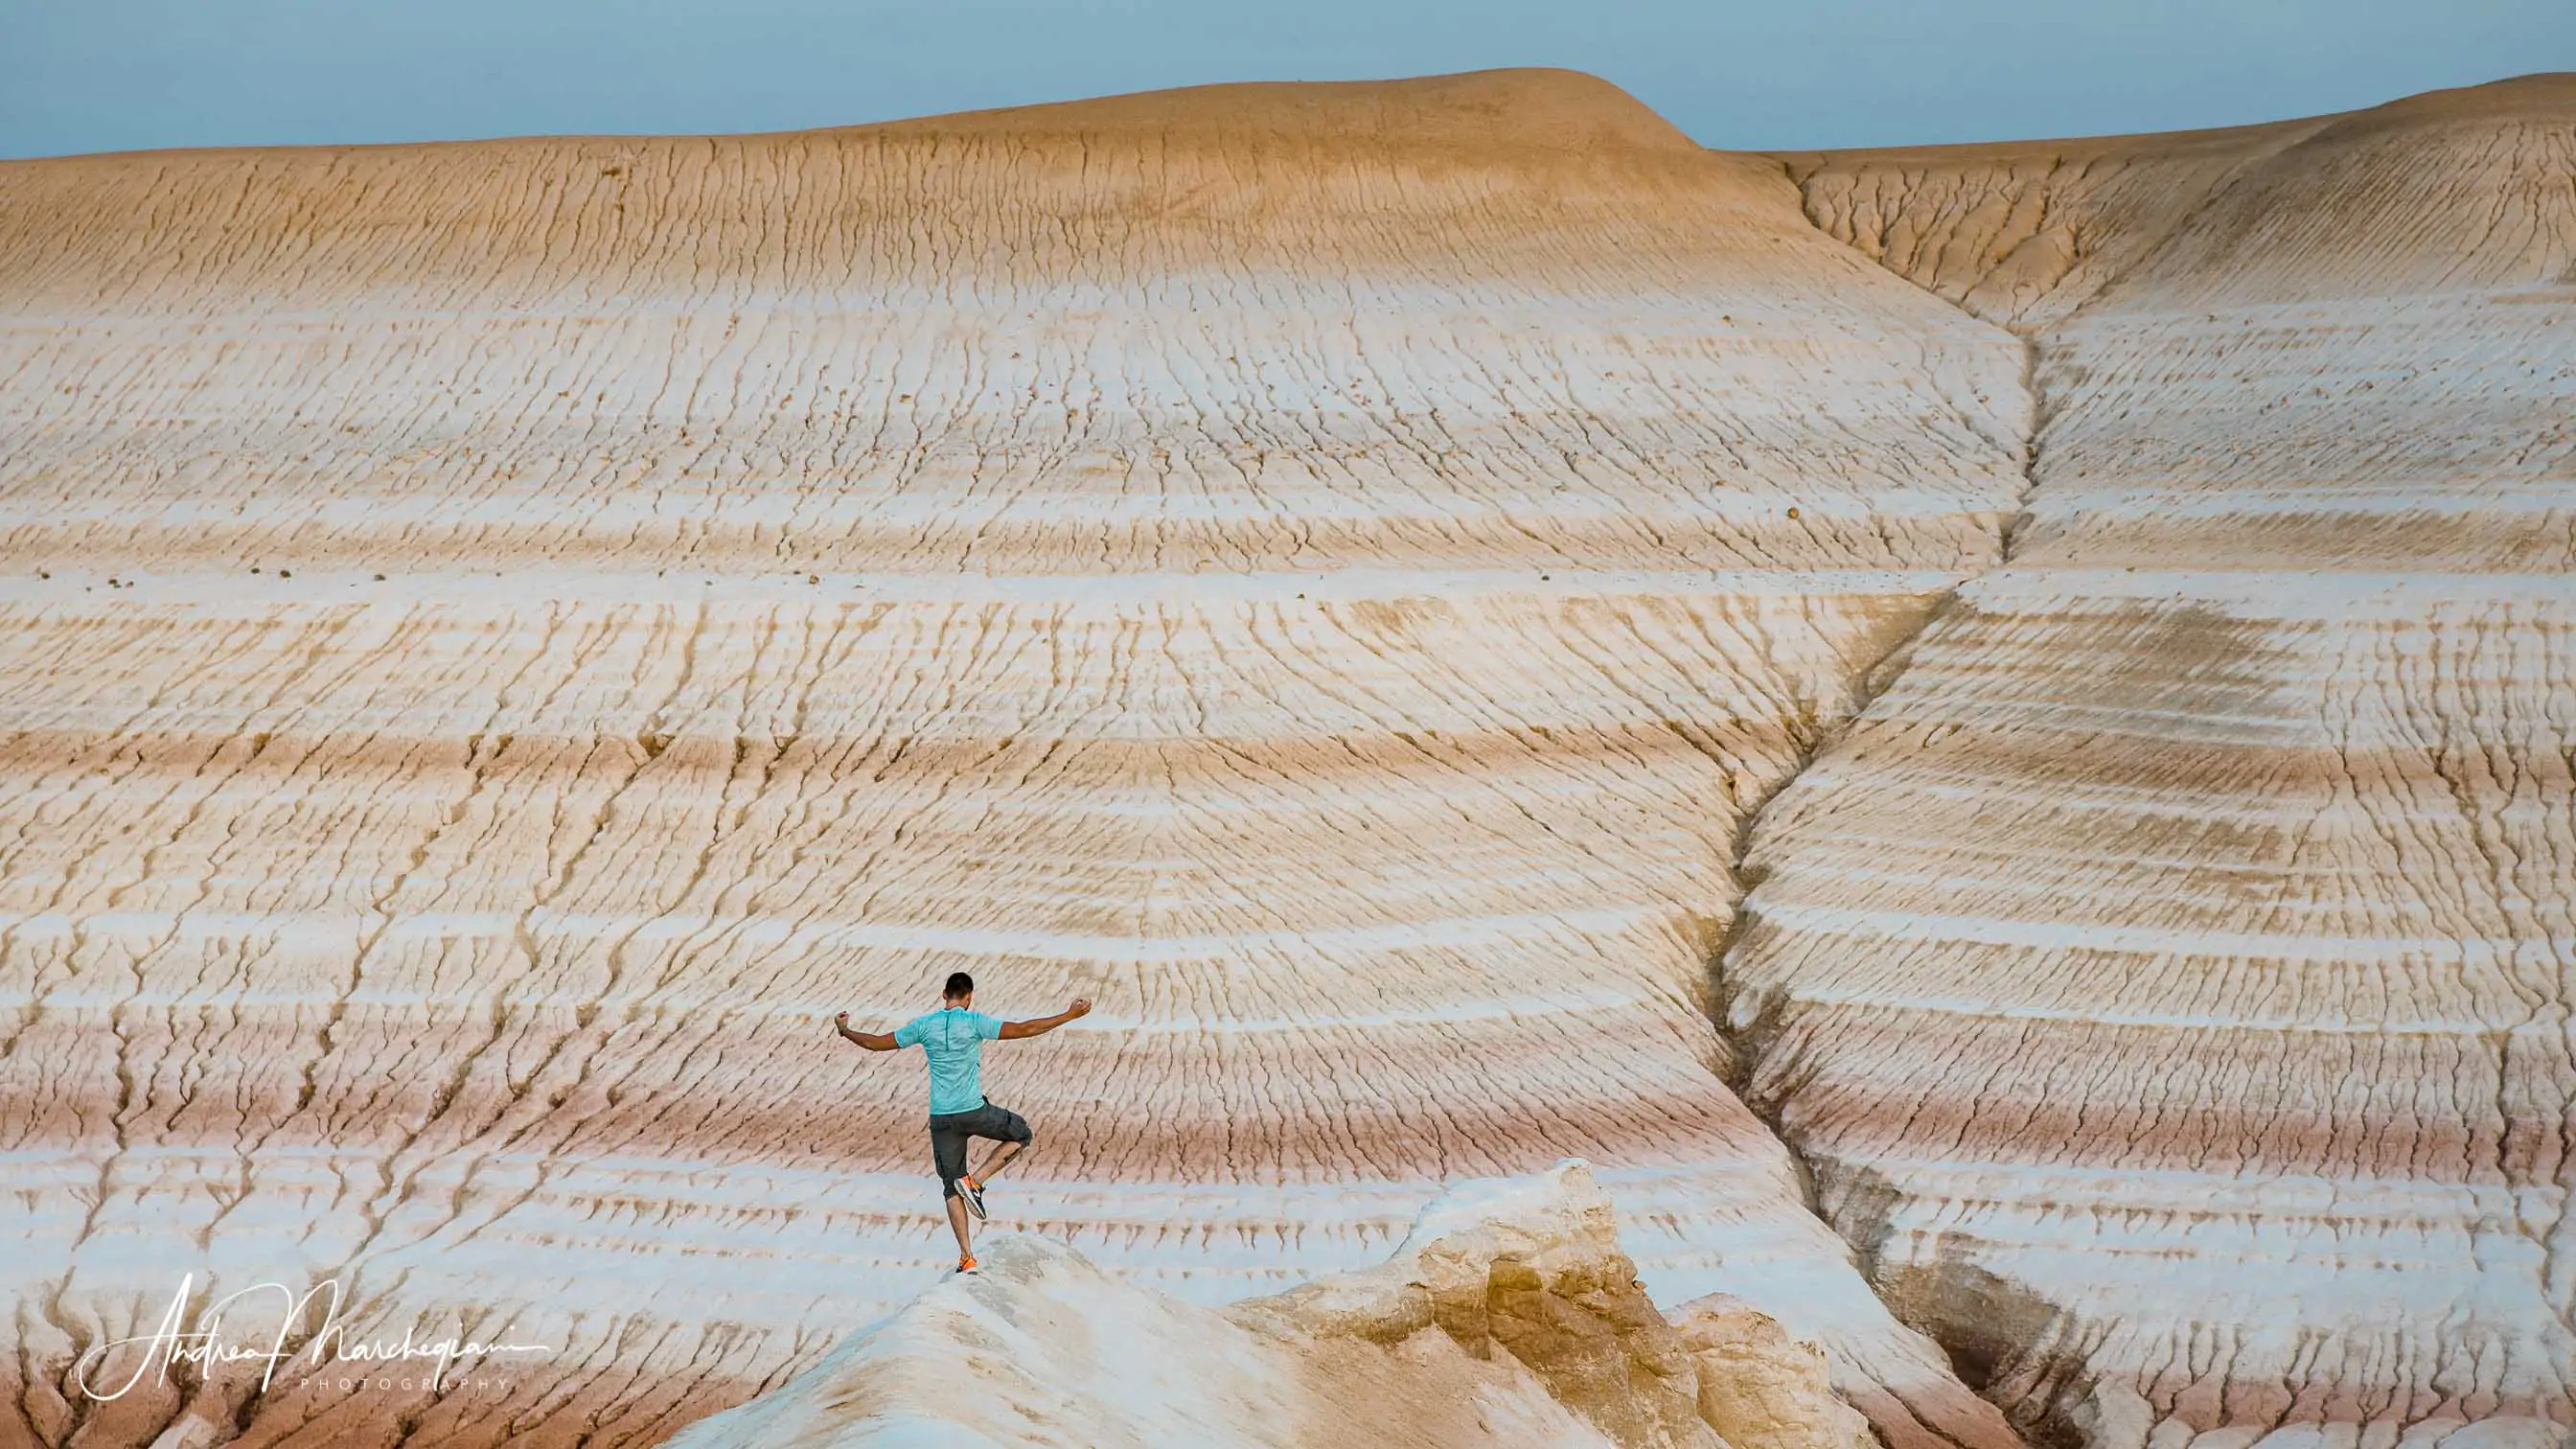
Kyzylkup, Tiramisu Hill, Kazakhstan.
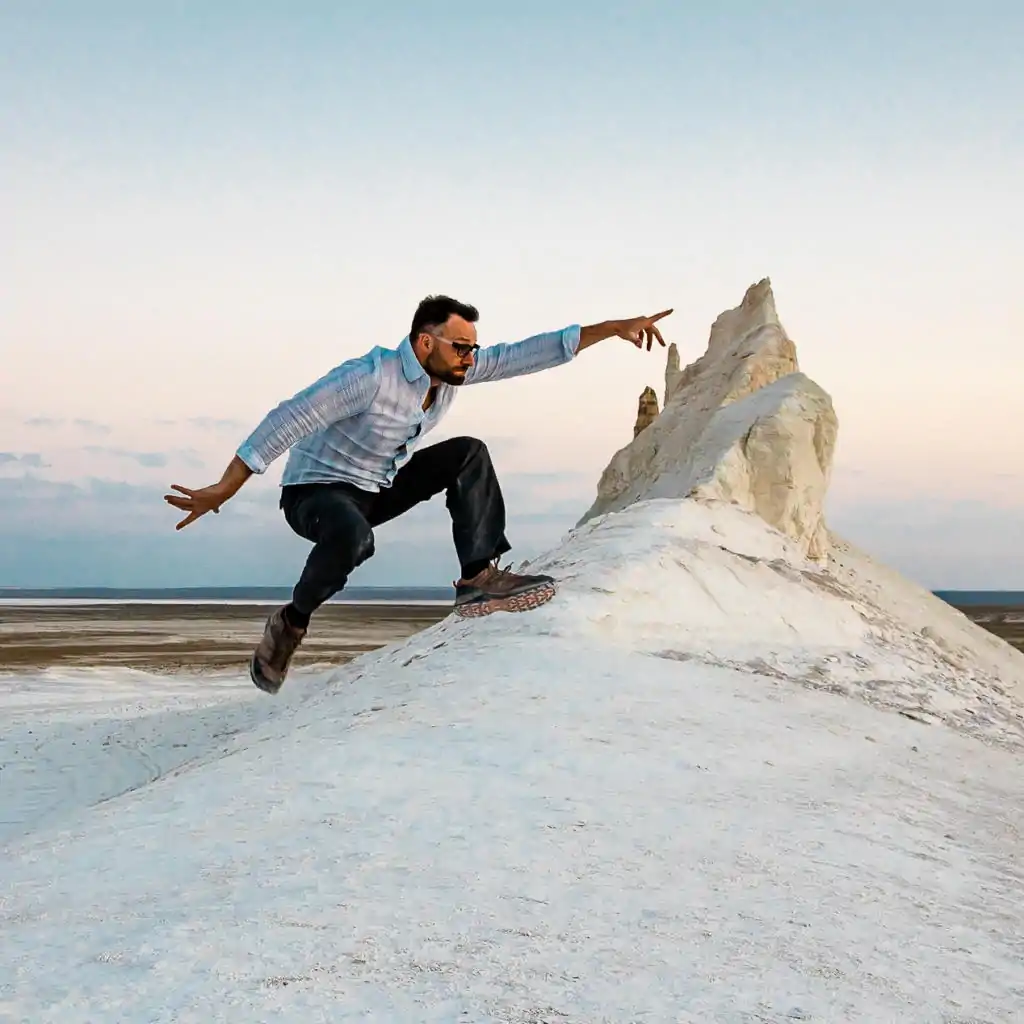
Photographing a landscape with a telephoto lens can be an original choice. In this case, the boy balancing on the mountain ridge stands out against the orange streaks of the background. The blue color of the t-shirt, enhanced by a slight Teal and Orange color grading, attracts the viewer’s attention and complements the tonality of the sky in the upper part of the frame.
>> Shooting data: 1/500s at f/2.8, ISO 250. Focal length 70mm on a full-frame camera.
Which lenses to prefer
Wide-angle lenses have always been the favorite choice of landscape photographers. Since there is no particular need for brightness, you can buy inexpensive lenses and still achieve good results. I’m often asked if it’s essential to get an ultra-wide-angle lens, such as a 16mm or a fisheye, to capture exceptional shots. Certainly, a very wide field of view allows us to interpret space in an original way, but the extreme degree of distortion can eventually disturb the vision. A medium wide-angle lens is definitely the most versatile choice, suitable for the majority of circumstances.
Night photography
Night photography, with its spectacular starry skies, pushes the capabilities of our camera to the limit and requires advanced knowledge. However, to achieve satisfactory results, it’s enough to follow some simple rules. It is mandatory to have a tripod, a remote shutter release, and a flashlight. Use the widest aperture of the lens (but do not exceed f/2.8) to minimize the noise generated by high ISO settings. A shutter speed within 5 seconds allows us to avoid capturing the Earth’s rotation and have pinpoint stars. Unfortunately, compromises often need to be made and longer exposure times are required to capture the faint light of the stars on the sensor. At night, the sensor is unable to autofocus on any point due to the lack of chromatic contrast, so manual focus is required. To assist, you can illuminate a point approximately 15-20 meters away with the help of a flashlight or adjust the focus to infinity and then move back a few millimeters on the lens ring. Practice and experimentation are key. You can also use live view to focus on the stars. Enjoy the moment, the tranquility, and you will improve with each attempt.
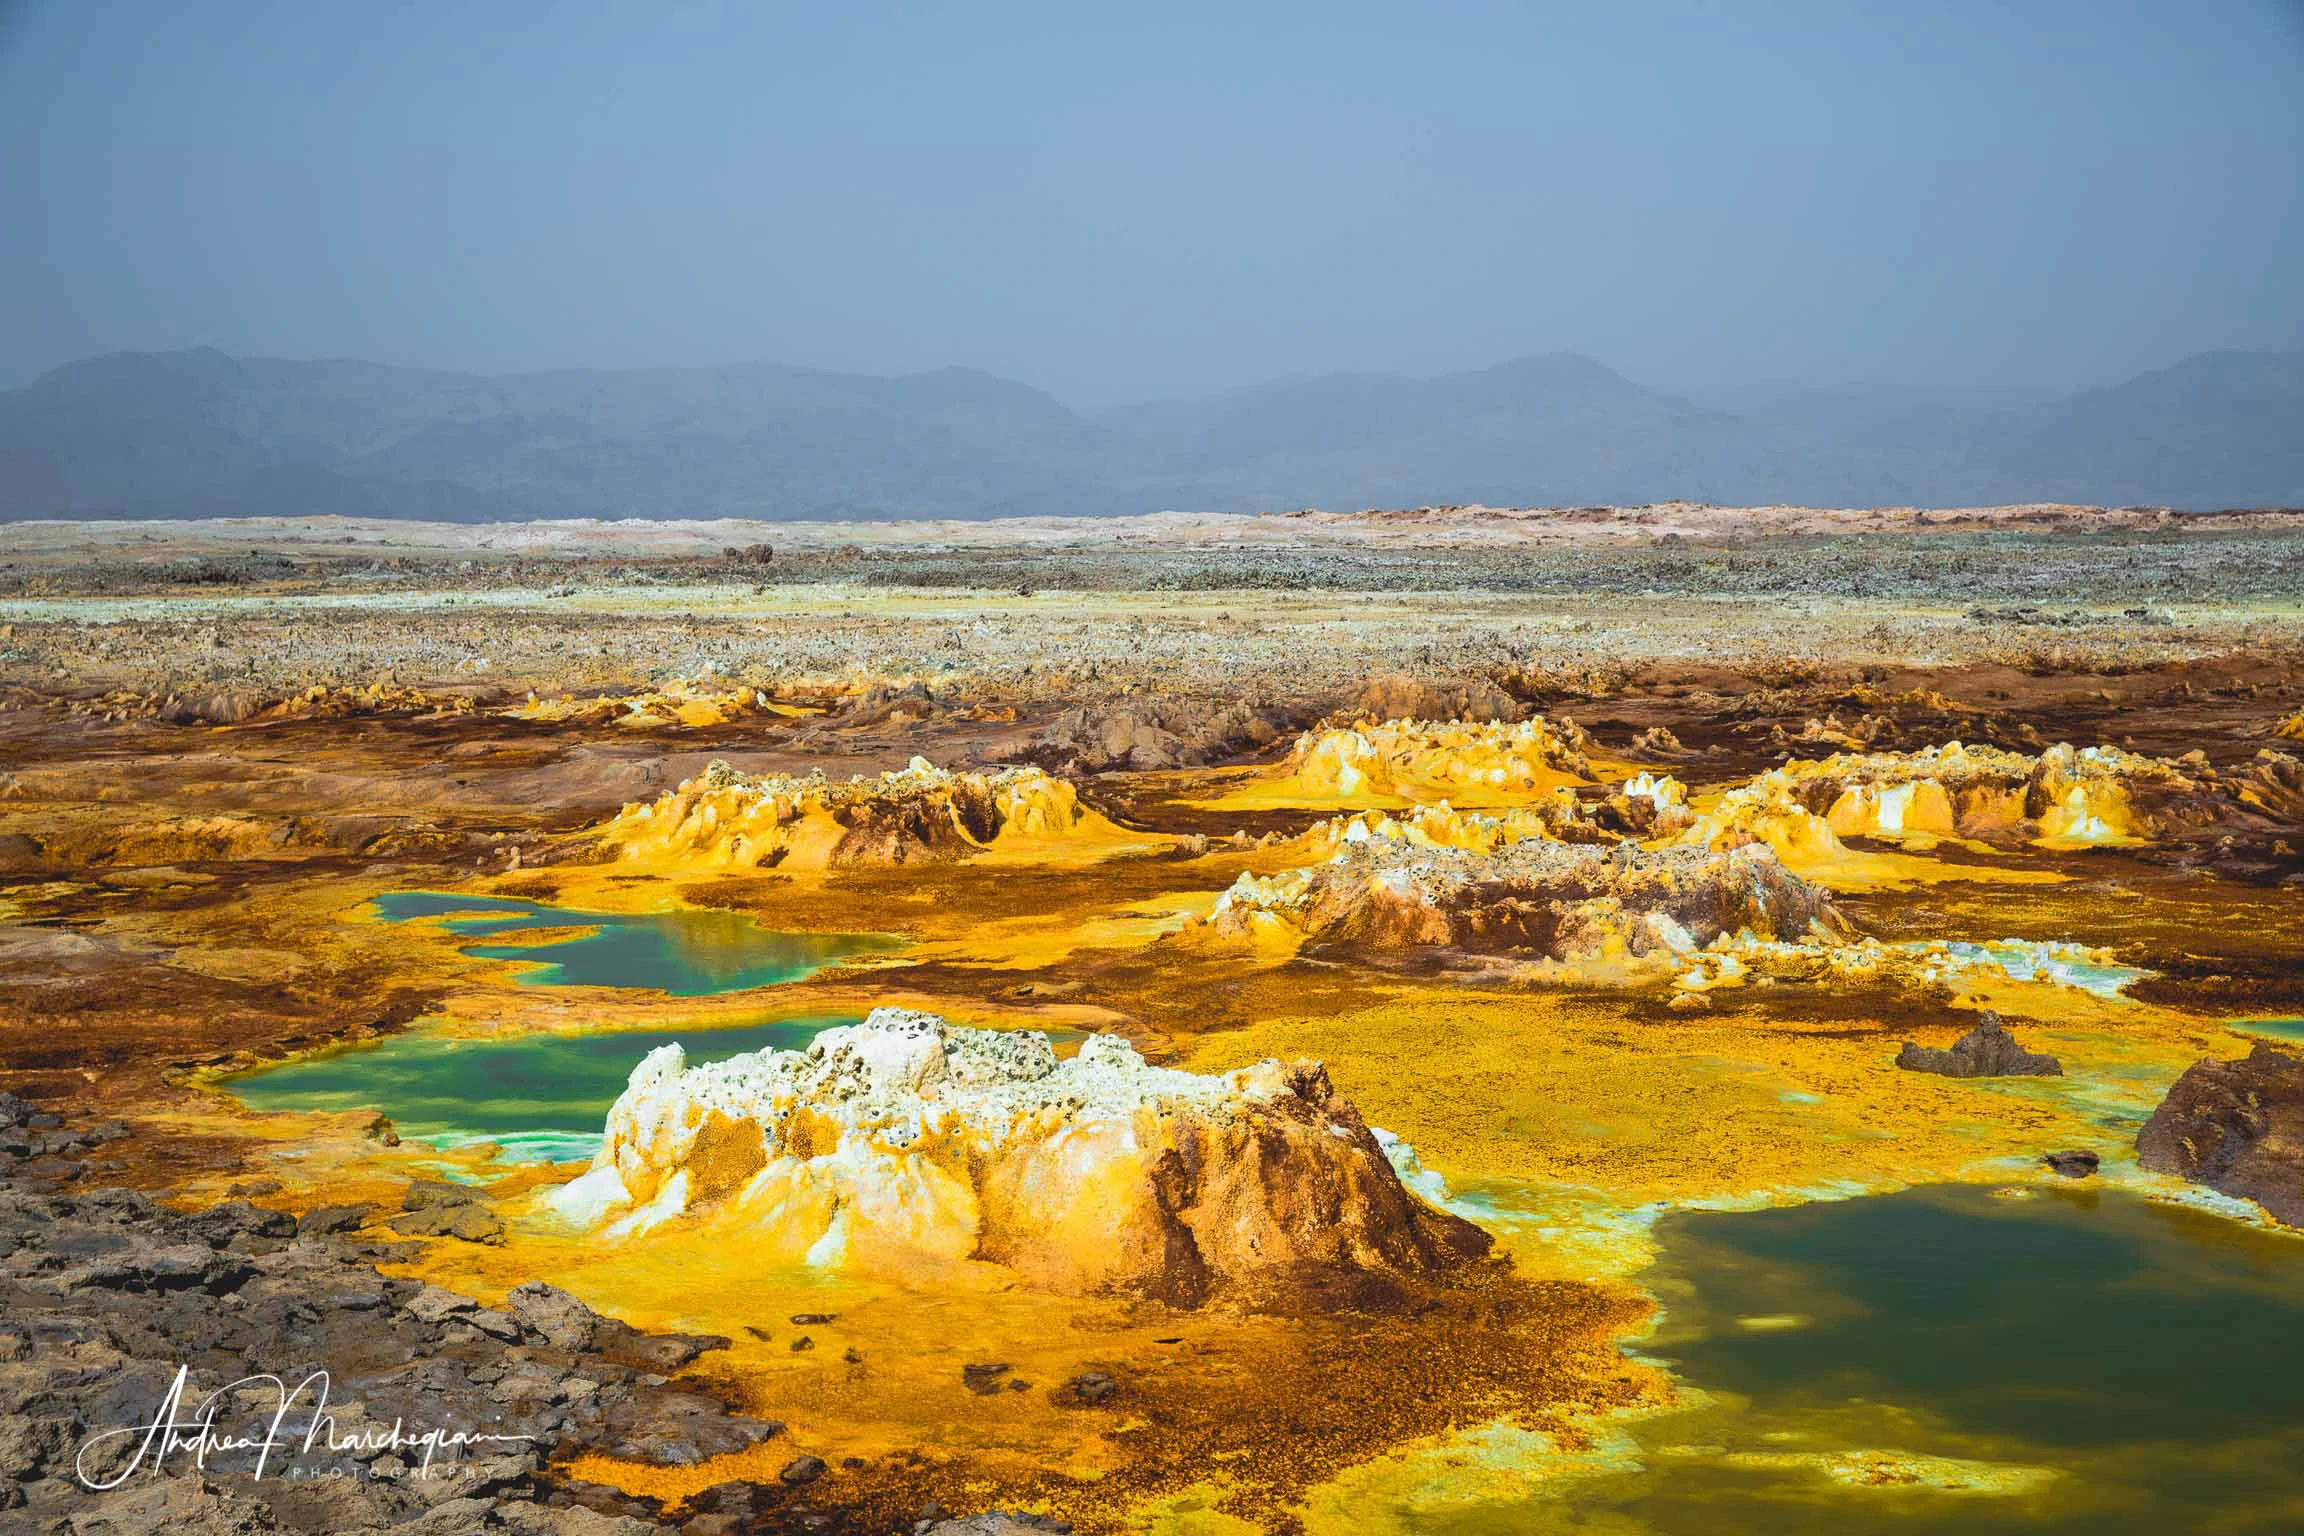
Dallol, Ethiopia.
In front of powerful landscapes like the Dallol crater in Ethiopia, one is left in awe. The salt formations and small geyser dripping sulfurous solutions shape a colorful and psychedelic scenery. I didn’t shoot with a too closed aperture to make the crater stand out and separate it from the background. Unfortunately, when traveling to such remote places, one can’t always choose the shooting time. In this case, I compensated for the flat and blinding midday light with careful post-processing work.
>> Shooting data: 1/640s at f/8, ISO 100. Focal length 50mm on a full-frame camera.
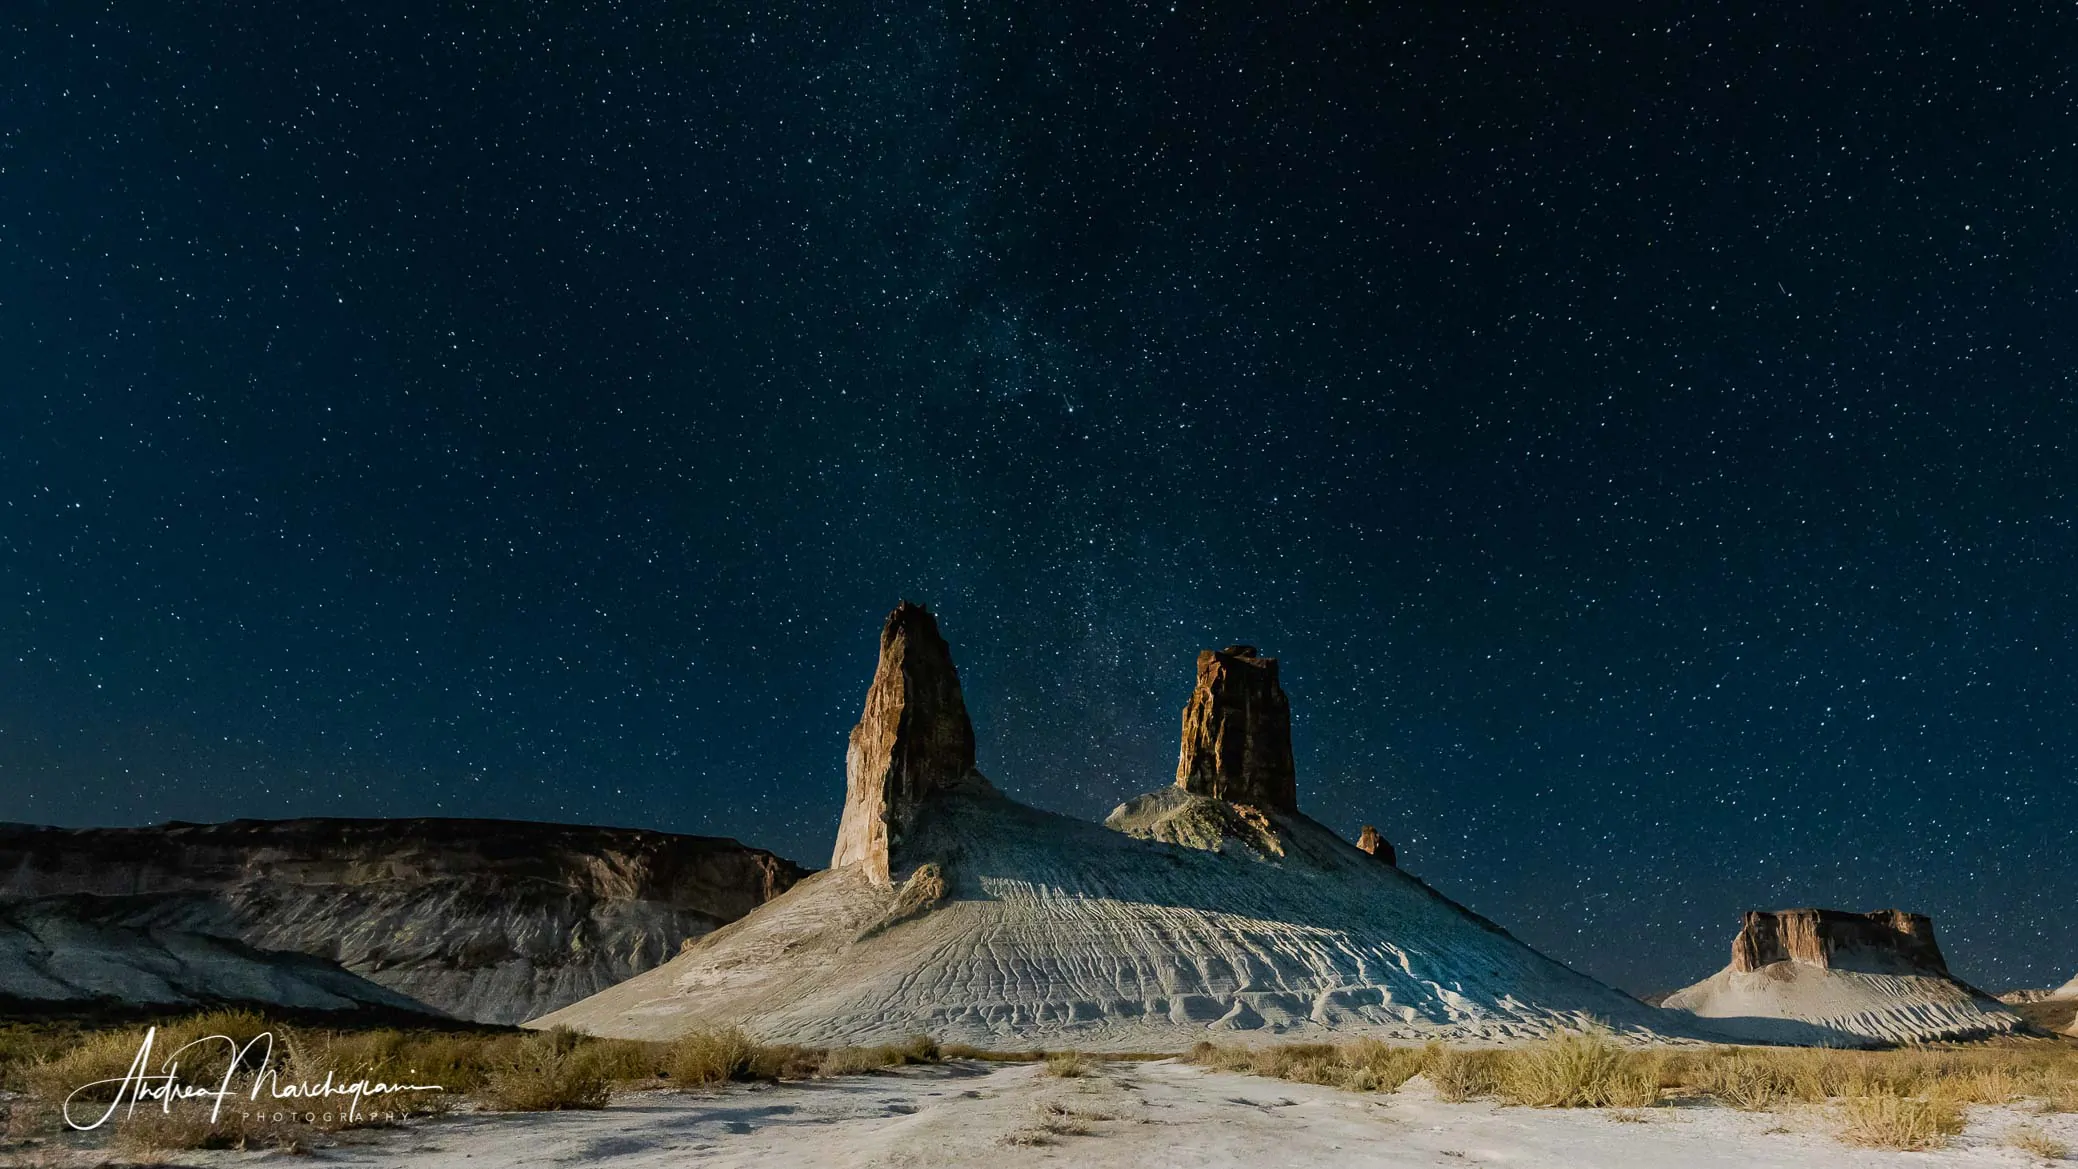
Bozzhira Canyon, Kazakhstan. The light pollution from the moon is often a major obstacle to capturing a clear view of the night sky, but in this case, I used it to my advantage. The moonlit rocky massif becomes as much the subject of the shot as the sky behind it. I took two shots with different exposures and blended them together in Photoshop.
Post-processing: Professional Shots with Small Adjustments
Among the various factors that attract the eye, color tone is perhaps the most powerful and immediate. You can easily notice this by visiting Instagram galleries dedicated to landscape photography. Most of them prefer bright exposures and a trendy (and often overused) color grading technique called teal and orange. Originating in Hollywood cinema to increase the tonal contrast between actors’ orange faces and the blue sky background, this technique is relatively easy to learn and can yield great results. It involves manipulating complementary colors by shifting red towards orange and blue towards aquamarine. By adjusting saturation and correcting excessive yellowing in greens, you can achieve a very appealing result. The key is not to overdo it to avoid an artificial look.
Always Carry a Mini Tripod
Photos with long exposures require a stable support base. There are pocket-sized tripods available in the market at affordable prices. Never leave without one!
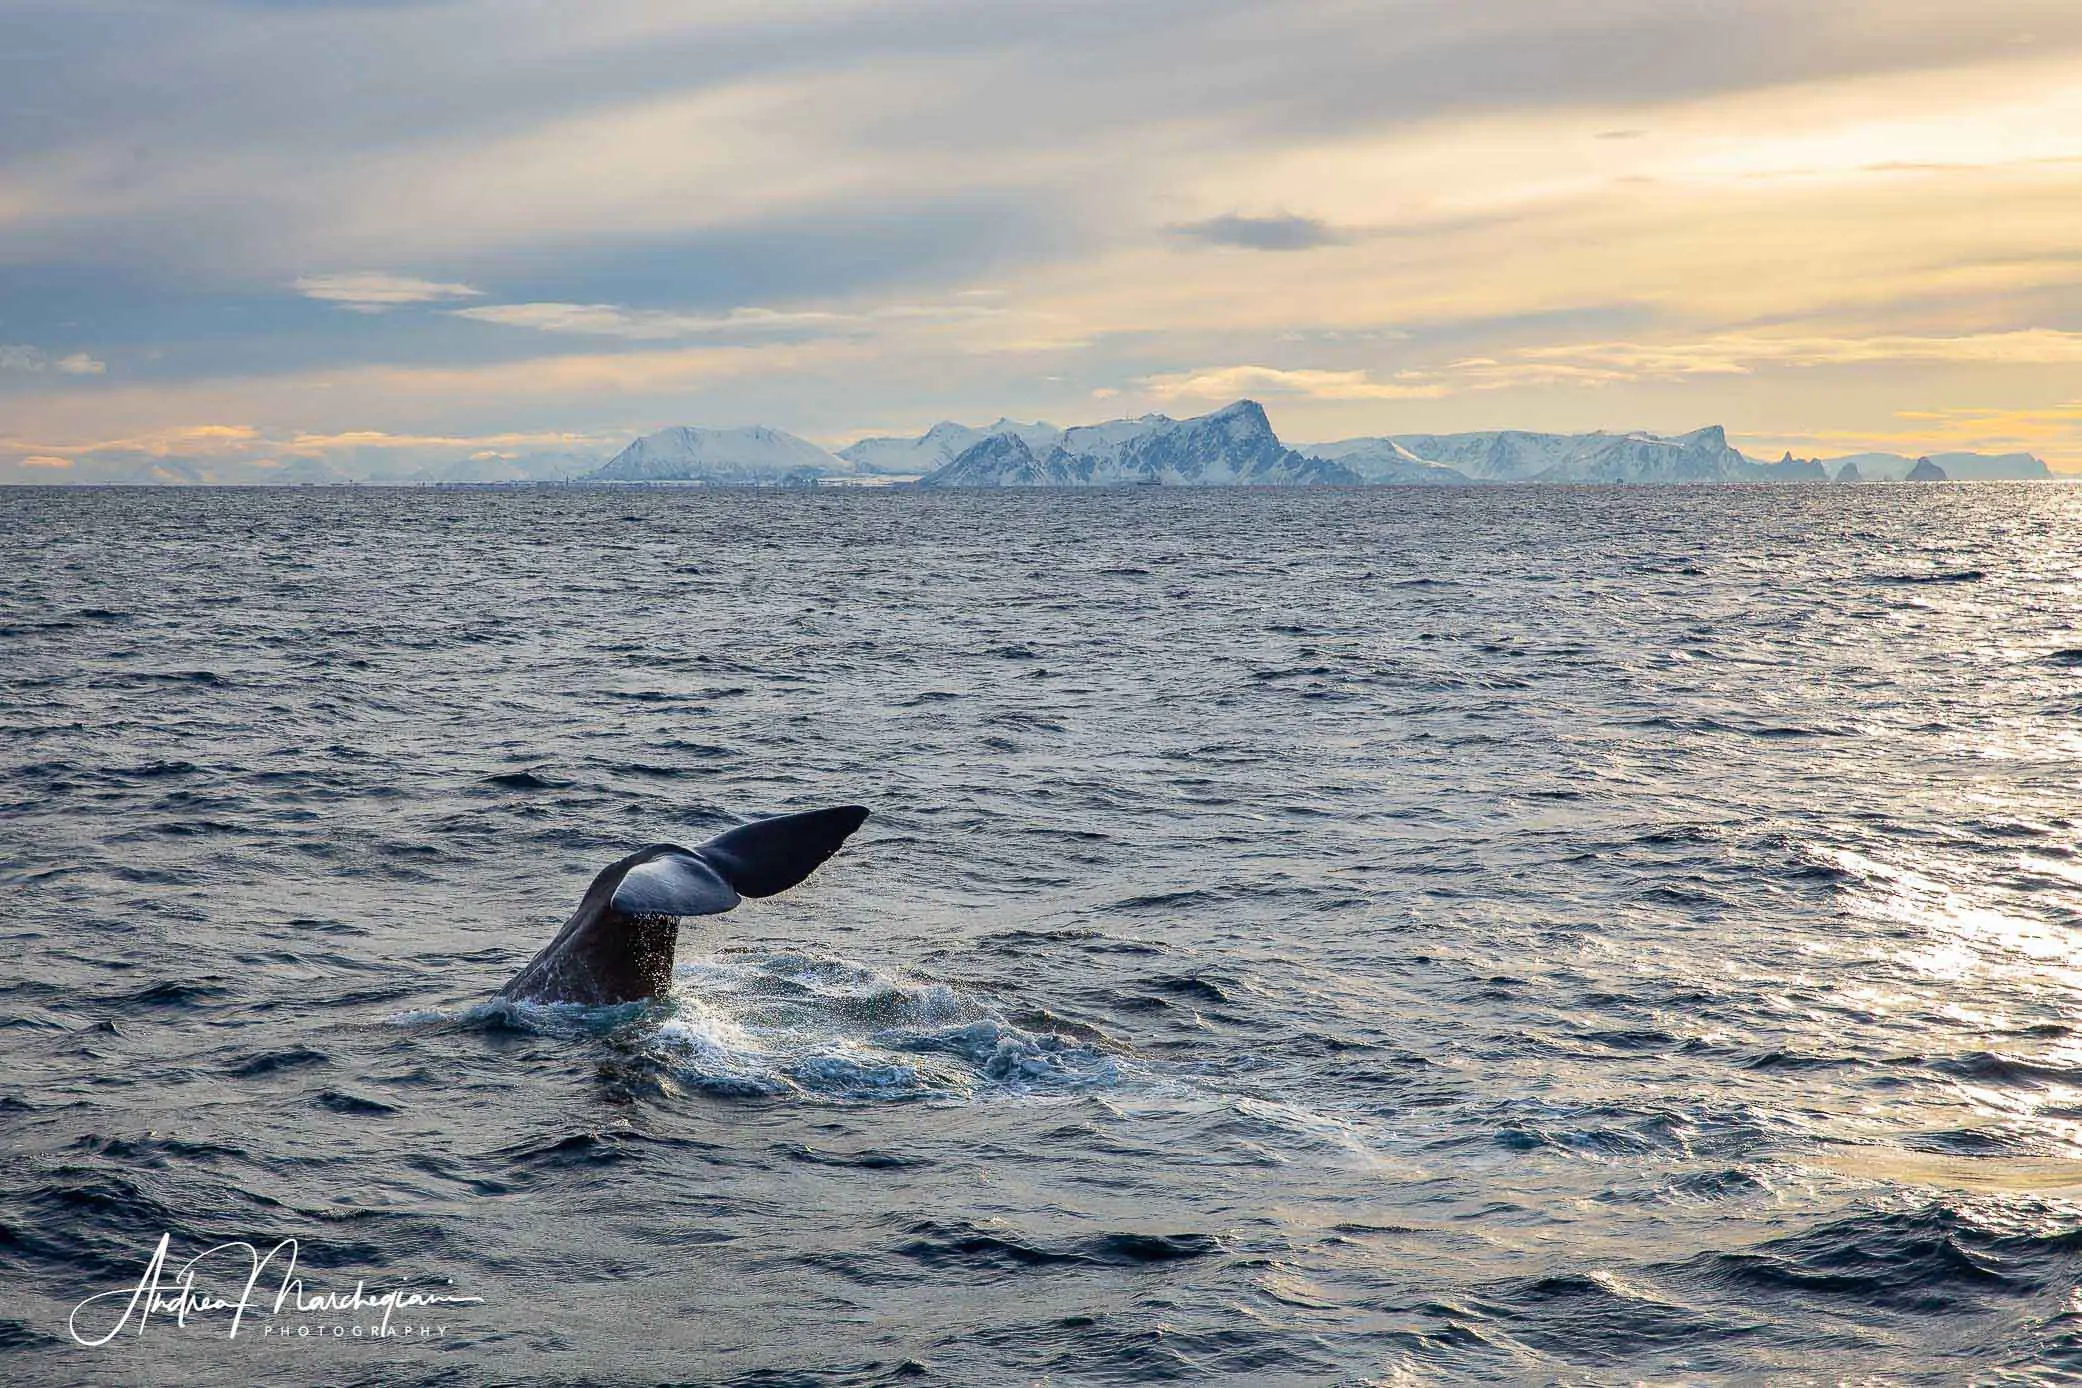
Andenes, Whale Safari, Norway.
The presence of an animal can make a landscape unforgettable. I was in the Lofoten Islands for a whale safari, braving the freezing wind with my waterproof gear, sunglasses, beanie, and woolen gloves. The tail emerging in the bottom left corner is crucial for contextualizing the image. I used a fast shutter speed to freeze the movement of the whale and the splashes of water. The late afternoon light, with shadows starting to lengthen, adds depth to an otherwise flat scene.
>> Shooting data: 1/640s at f/10, ISO 400. 70mm focal length on a full-frame camera.
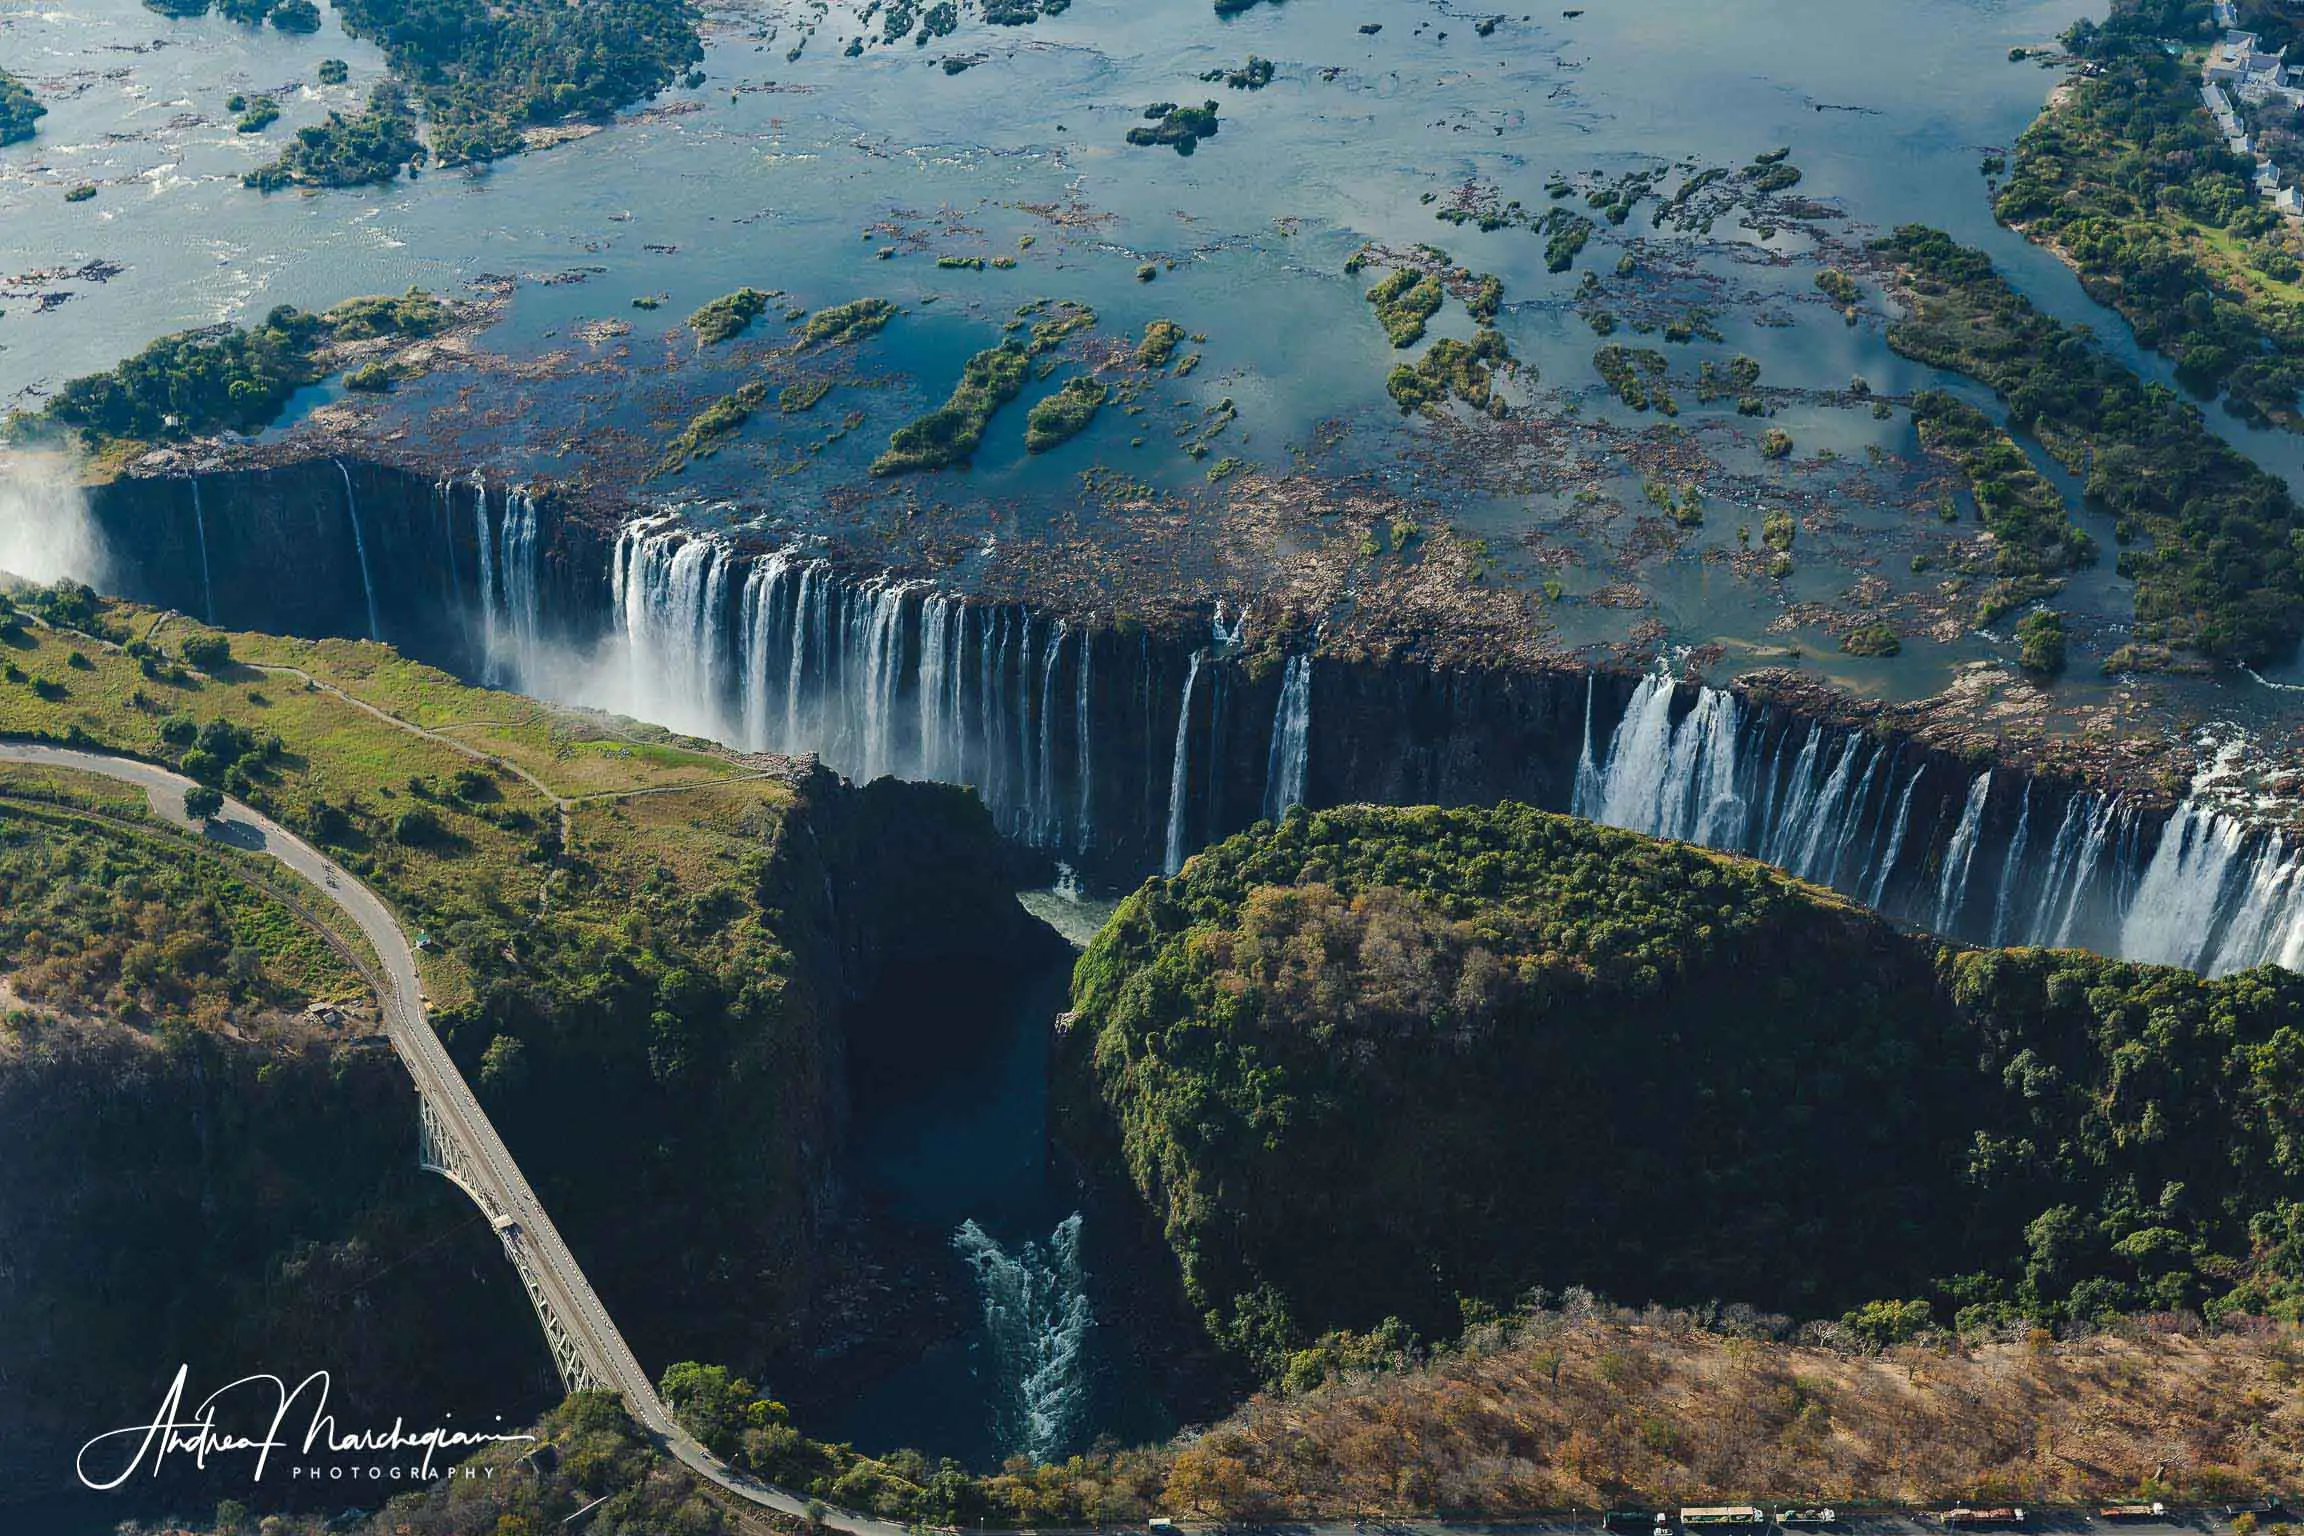
Victoria Falls, Zimbabwe.
I captured this image while flying over the majestic Victoria Falls. Although I couldn’t choose the angle of the shot, I composed the frame by including the road and the bridge in the bottom left corner. After wandering along the edge of the waterfall, the gaze descends to find the urban element, creating a thematic contrast between the natural and human worlds that can provide food for thought.
>> Shooting data: 1/200s at f/5.6, ISO 100. 47mm focal length on a full-frame camera.


